 Embedded Development
 The Complete Guide to CH55x MCUs: From Selection to USB Device Development in Practice
Hi everyone, it’s your friend MakerOnsite here.
I’m sure many of you working in embedded development have faced this dilemma: it’s time to pick a chip for your project, and you’re staring at CH551, CH552, CH554, CH558, CH559… How do you choose among all these models? Once you’ve picked one, how do you set up the development environment? How do you write USB device firmware? How do you build a debugger?
In today’s article, I’m going to consolidate years of hard-won experience into one place — from chip selection to hands-on projects — to help you fully master the CH55x series. Ready? Let’s get started.
1. CH55x Series Comparison
Here’s a core parameter comparison table — this is my go-to reference for selection:
| Model | Flash | RAM | USB | Timers | ADC | Ref. Price |
|---|---|---|---|---|---|---|
| CH551 | 10KB | 256B | Device | 2 | 8-bit | ¥1.5 |
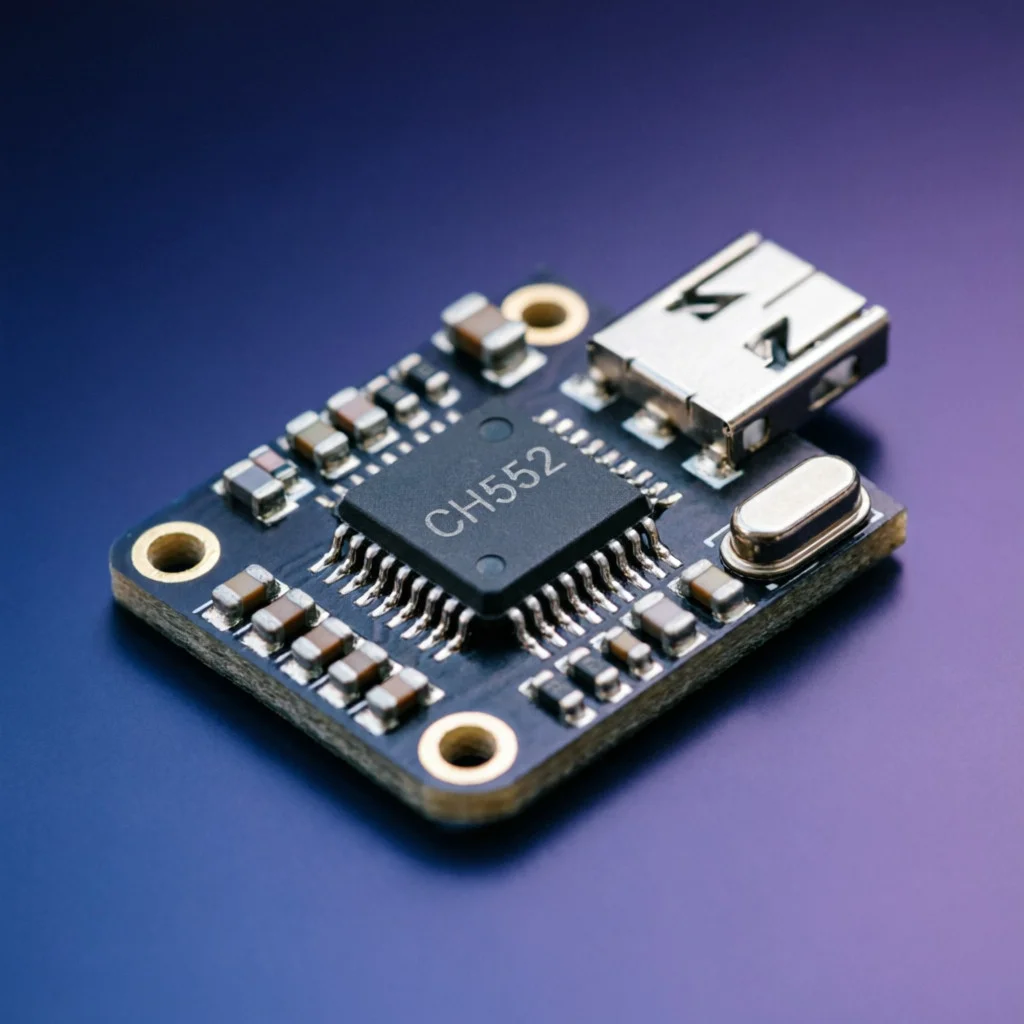
| CH552 | 14KB | 384B | Device | 2 | 8-bit | ¥2.0 |
| CH554 | 14KB | 384B | Device | 3 | 10-bit | ¥2.5 |
| CH558 | 64KB | 4KB | Device | 4 | 10-bit | ¥5.0 |
| CH559 | 64KB | 4KB | Host+Device | 4 | 10-bit | ¥6.5 |
Selection Recommendations:
- Beginner learning / simple projects: CH552 is more than enough — great value, costs less than a cup of milk tea
- Need more timers: CH554 has an extra timer, ideal for PWM control scenarios
- Large programs / complex logic: CH558 offers 64KB Flash with plenty of headroom
- USB Host requirements: Only the CH559 supports USB Host — the go-to choice for keyboards, mice, and other HID devices
If you’re just learning, a CH552 or CH554 development board is all you need. If you plan to do USB device development, go straight for the CH559.
2. Hardware Preparation
Below is the basic hardware checklist for development and debugging:
| Item | Model / Spec | Ref. Price |
|---|---|---|
| CH552 dev board | With USB interface | ¥10 |
| CH559 dev board | USB Host version | ¥25 |
| USB-to-TTL module | CH340/CP2102 | ¥5 |
| Breadboard | 400 holes | ¥8 |
| Jumper wires | Male-to-female 20cm | ¥3 |
| LED | 5mm red | ¥0.5 |
| Resistor | 220Ω 1/4W | ¥0.2 |
| Tactile switch | 6×6mm | ¥0.3 |
Total entry-level cost stays under ¥100. If you already have a CH552 dev board on hand, the cost is practically zero.
3. Development Environment Setup
Step 1: Install the Toolchain
The CH55x uses the SDCC compiler (an open-source 8051 compiler). Installation steps:
# Update package sources
sudo apt-get update

# Install SDCC compiler
sudo apt-get install sdcc

# Install CH55x flashing tool ch552tool
git clone https://github.com/arpruss/ch552tool.git
cd ch552tool
make
sudo make install
⚠️ Note: Many people run into dependency issues when installing ch552tool. If
makefails complaining about missing libusb, install the dependency first:sudo apt-get install libusb-1.0-0-dev
Step 2: Configure USB Permissions
Flashing firmware requires USB permissions — otherwise you’ll need sudo every time, which gets tedious:
# Create udev rules
sudo tee /etc/udev/rules.d/70-ch552.rules > /dev/null << 'EOF'
SUBSYSTEM=="usb", ATTR{idVendor}=="4348", ATTR{idProduct}=="55e0", MODE="0666"
SUBSYSTEM=="usb", ATTR{idVendor}=="4348", ATTR{idProduct}=="55e8", MODE="0666"
EOF

# Reload udev rules
sudo udevadm control --reload-rules
sudo udevadm trigger
Step 3: Verify Installation
# Check SDCC version
sdcc -v

# Check ch552tool
ch552tool --help
If both commands produce normal output, congratulations — your environment is set up!
4. Your First Program: Blinking an LED
Let’s write the simplest LED blink program to get familiar with the development workflow.
/* LED Blink Example - CH552 */
#include <ch554.h>
#include <debug.h>

// Define LED pin (modify according to your actual dev board)
#define LED_PIN P1_0

void main() {
    // Configure system clock to 24MHz
    SAFE_MOD = 0x55;
    SAFE_MOD = 0xAA;
    CLOCK_CFG |= bOSC_EN_XT;  // Enable external crystal oscillator
    SAFE_MOD = 0x00;

    // Configure LED pin as push-pull output
    P1_DIR |= (1 << 0);
    P1_PU &= ~(1 << 0);

    // Main loop
    while(1) {
        LED_PIN = 0;      // LED on
        DelayMs(500);     // Delay 500ms
        LED_PIN = 1;      // LED off
        DelayMs(500);     // Delay 500ms
    }
}
How It Works:
This code does three things:
- Configures the system clock to 24MHz, ensuring the chip runs at the correct frequency
- Sets pin P1.0 to push-pull output mode to drive the LED
- Alternates between high and low output in the main loop to make the LED blink
Compiling and Flashing
# Compile the code
sdcc -mcc52 --no-xinit-code --code-loc 0x0000 --data-loc 0x0030 led.c

# Flash the firmware (press and hold the BOOT button on the board, then power on)
ch552tool write led.ihx
Flashing Tip: The CH55x series requires entering Bootloader mode for flashing. The method is: press and hold the BOOT button, plug in USB power, then release the BOOT button. The device should then be recognized as “CH55x Bootloader,” and you can proceed with flashing.
5. Project 1: Building a USB HID Device with CH559
What Is a HID Device?
HID (Human Interface Device) is a device class in the USB protocol, covering keyboards, mice, game controllers, and more. Windows, Linux, and macOS all natively support HID — no extra drivers needed, just plug and play. For embedded development, this is incredibly convenient.
Today’s goal: use the CH559 to build a custom HID keyboard device that automatically sends Ctrl+Alt+Delete when a button is pressed.
HID Protocol Basics
The core of a HID device is its descriptors — data structures that tell the host “what kind of device I am and what I can do.” A typical HID device requires the following descriptors:
- Device Descriptor: Declares VID/PID, device class, and other basic information
- Configuration Descriptor: Declares power mode and number of interfaces
- Interface Descriptor: Declares the interface type (HID class = 0x03)
- HID Descriptor: Declares the report descriptor length and version
- Report Descriptor: Defines the data format and meaning — the soul of a HID device
- Endpoint Descriptor: Declares the interrupt endpoint’s address, transfer type, and packet size
Writing USB Descriptors
// Device Descriptor
__code UINT8 DevDesc[] = {
    0x12, 0x01, 0x10, 0x01, 0x00, 0x00, 0x00, 0x08,
    0x48, 0x43, 0x59, 0x55, 0x00, 0x01, 0x01, 0x02,
    0x00, 0x01, 0x01, 0x00, 0x00, 0x01
};

// Configuration Descriptor (includes HID descriptor)
__code UINT8 CfgDesc[] = {
    // Configuration descriptor header
    0x09, 0x02, 0x22, 0x00, 0x01, 0x01, 0x00, 0x80, 0x32,
    // Interface descriptor
    0x09, 0x04, 0x00, 0x00, 0x01, 0x03, 0x01, 0x01, 0x00,
    // HID descriptor
    0x09, 0x21, 0x10, 0x01, 0x00, 0x01, 0x22, 0x20, 0x00,
    // Endpoint descriptor (interrupt endpoint)
    0x07, 0x05, 0x81, 0x03, 0x08, 0x00, 0x0A
};

// Report Descriptor (defines keyboard data format)
__code UINT8 ReportDesc[] = {
    0x05, 0x01,        // Usage Page (Generic Desktop)
    0x09, 0x06,        // Usage (Keyboard)
    0xA1, 0x01,        // Collection (Application)
    0x05, 0x07,        //   Usage Page (Key Codes)
    0x19, 0xE0,        //   Usage Minimum (224)
    0x29, 0xE7,        //   Usage Maximum (231)
    0x15, 0x00,        //   Logical Minimum (0)
    0x25, 0x01,        //   Logical Maximum (1)
    0x75, 0x01,        //   Report Size (1)
    0x95, 0x08,        //   Report Count (8)
    0x81, 0x02,        //   Input (Data, Variable, Absolute)
    0x95, 0x01, 0x75, 0x08, 0x81, 0x01,  // Reserved byte
    0x95, 0x05, 0x75, 0x01, 0x05, 0x08,  // LED output report
    0x19, 0x01, 0x29, 0x05, 0x91, 0x02,
    0x95, 0x01, 0x75, 0x03, 0x91, 0x01,  // Padding bits
    0x95, 0x06, 0x75, 0x08, 0x15, 0x00,  // 6 key bytes
    0x25, 0x65, 0x05, 0x07, 0x19, 0x00,
    0x29, 0x65, 0x81, 0x00,
    0xC0               // End Collection
};
The report descriptor is the heart of a HID device. The code above defines a standard keyboard: the first 8 bits represent modifier keys (Ctrl, Alt, Shift, etc.), the next 8 bits are reserved, then 5 bits indicate LED status (NumLock, CapsLock, etc.), and the final 6 bytes represent pressed key codes (supporting 6-key rollover).
Main Program and Interrupt Handling
/* main.c */
#include <ch554.h>
#include <debug.h>

#define BUTTON_PIN P3_0
#define LED_PIN    P1_0

// USB endpoint buffers
__at (0x0040) __xdata UINT8 Ep0Buffer[8];
__at (0x0048) __xdata UINT8 Ep1Buffer[8];

// Keyboard report data structure
typedef struct {
    UINT8 modifiers;
    UINT8 reserved;
    UINT8 keys[6];
} KeyboardReport;

__xdata KeyboardReport KeyReport;

extern void USB_Device_Init();
extern void USB_ISR() __interrupt (USB_INT_VECTOR);

void DelayMs(UINT16 ms) {
    UINT16 i, j;
    for(i = 0; i < ms; i++)
        for(j = 0; j < 2000; j++);
}

void main() {
    USB_Device_Init();
    EA = 1;  // Enable global interrupts

    // Configure button pin (pull-up input)
    P3_DIR &= ~(1 << 0);
    P3_PU |= (1 << 0);

    // Configure LED pin
    P1_DIR |= (1 << 0);

    memset(&KeyReport, 0, sizeof(KeyReport));

    while(1) {
        if(BUTTON_PIN == 0) {
            DelayMs(20);  // Debounce
            if(BUTTON_PIN == 0) {
                LED_PIN = 0;
                // Send Ctrl+Alt+Delete
                KeyReport.modifiers = 0x01 | 0x04;  // Ctrl + Alt
                KeyReport.keys[0] = 0x4C;            // Delete
                memcpy(Ep1Buffer, &KeyReport, 8);
                DelayMs(100);
                // Release keys
                memset(&KeyReport, 0, sizeof(KeyReport));
                memcpy(Ep1Buffer, &KeyReport, 8);
                LED_PIN = 1;
                DelayMs(500);  // Prevent re-triggering
            }
        }
    }
}
Compiling and Flashing
sdcc -mcc59 --no-xinit-code --code-loc 0x0000 --data-loc 0x0030 main.c USB_DEV.C
ch552tool write main.ihx
After flashing, plug the device into your computer. Press the button, and the computer should receive the Ctrl+Alt+Delete key combination.
⚠️ Note: Before testing in a production environment, it’s best to try it in a virtual machine first to avoid accidental logout or reboot.
6. Project 2: Building a SWD USB Debugger with CH552
KEIL debuggers too expensive? Just build your own — the total cost is under ¥12. Using a CH552, you can make a USB debugger that supports the SWD protocol, capable of debugging STM32, GD32, HK32, and various other ARM Cortex-M core chips.
Bill of Materials
| Component | Model | Price |
|---|---|---|
| Main chip | CH552G | ¥3.5 |
| USB connector | Type-C female | ¥1.2 |
| Debug header | 2.54mm pin header | ¥0.5 |
| Crystal oscillator | 12MHz | ¥0.3 |
| Capacitor | 10pF × 2 | ¥0.2 |
| Resistor | 1kΩ × 2 | ¥0.1 |
| LED indicator | 3mm red | ¥0.2 |
| PCB prototyping | 5×5cm | ¥5.0 |
| Total | ¥11.0 |
SWD Interface Wiring
The SWD protocol only requires 4 wires:
| Signal | Description | CH552 Pin |
|---|---|---|
| VCC | Power | 5V/3.3V output |
| GND | Ground | GND |
| SWCLK | Clock | P1.4 |
| SWDIO | Data | P1.5 |
CH552G
           ┌─────────────────┐
    USB D- │1  ○         ○ 40│ VCC
    USB D+ │2  ○         ○ 39│ GND
           │   ○         ○   │
           │   ○         ○   │ P1.4 (SWCLK)
           │   ○         ○   │ P1.5 (SWDIO)
           └─────────────────┘
⚠️ The CH552 runs on 5V supply, but its IO pins are 3.3V compatible. If the target chip is a 3.3V system, it’s recommended to step down the voltage via an LDO (e.g., AMS1117-3.3) to power the target board.
SWD Timing Implementation
#define SWDIO_PIN P1_5
#define SWCLK_PIN P1_4

// SWDIO direction control (0=output, 1=input)
__sbit __at (0x94) DIRECTION;

void SWD_Init() {
    SWCLK_PIN = 0;
    SWDIO_PIN = 0;
    DIRECTION = 0;  // Set as output
}

void SWD_WriteBit(UINT8 bit) {
    SWDIO_PIN = bit;
    SWCLK_PIN = 1;
    _nop_(); _nop_();
    SWCLK_PIN = 0;
}

UINT8 SWD_ReadBit() {
    UINT8 bit;
    DIRECTION = 1;   // Switch to input
    SWCLK_PIN = 1;
    _nop_();
    bit = SWDIO_PIN;
    SWCLK_PIN = 0;
    DIRECTION = 0;   // Restore output
    return bit;
}

void SWD_WriteWord(UINT32 data) {
    for (UINT8 i = 0; i < 32; i++)
        SWD_WriteBit((data >> i) & 1);
}

UINT32 SWD_ReadWord() {
    UINT32 data = 0;
    for (UINT8 i = 0; i < 32; i++)
        data |= (UINT32)SWD_ReadBit() << i;
    return data;
}
SWD Protocol Handshake
Connecting to the target chip requires a handshake sequence first:
void SWD_Sequence_Switch() {
    // Send at least 50 ones to complete the line switch
    for (UINT8 i = 0; i < 56; i++)
        SWD_WriteBit(1);
}

UINT8 SWD_Connect() {
    UINT32 idcode;

    SWD_Sequence_Switch();

    // Read the IDCODE register
    SWD_WriteWord(0x9E);  // Read IDCODE request
    SWD_WriteBit(0);      // Parity bit
    SWD_WriteBit(1);      // Stop bit

    UINT8 ack = SWD_ReadBit() | (SWD_ReadBit() << 1) | (SWD_ReadBit() << 2);
    if (ack != 0x01) return 0;  // Connection failed

    idcode = SWD_ReadWord();
    if (idcode == 0 || idcode == 0xFFFFFFFF) return 0;

    return 1;  // Connection successful
}
Host-Side Testing
After flashing the firmware, you can verify it with a Python script:
import serial
import struct

class SWDDebugger:
    def __init__(self, port, baudrate=115200):
        self.serial = serial.Serial(port, baudrate, timeout=1)

    def connect(self):
        self.serial.write(b'CONNECT\n')
        return self.serial.readline().strip() == b'OK'

    def read_memory(self, address, size=4):
        cmd = struct.pack('<BI', 0x01, address)
        self.serial.write(cmd)
        response = self.serial.read(size)
        return int.from_bytes(response, 'little')

    def halt(self):
        self.serial.write(b'HALT\n')
        return self.serial.readline().strip() == b'OK'

    def resume(self):
        self.serial.write(b'RESUME\n')
        return self.serial.readline().strip() == b'OK'

if __name__ == '__main__':
    debugger = SWDDebugger('/dev/ttyUSB0')
    if debugger.connect():
        print('✅ Connection successful')
        idcode = debugger.read_memory(0xE00FFFD0)
        print(f'Chip ID: 0x{idcode:08X}')
        debugger.halt()
        print('CPU halted')
        debugger.resume()
        print('CPU resumed')
    else:
        print('❌ Connection failed')
Output:
$ python3 swd_debugger.py
✅ Connection successful
Chip ID: 0x2BA01477
CPU halted
PC: 0x08000234
CPU resumed
7. Common Troubleshooting
Issue 1: “Device Not Found” During Flashing
Root Cause Analysis: Insufficient USB permissions, incorrect Bootloader mode entry, or a charge-only USB cable (no data lines).
Solutions:
- Confirm udev rules are configured (refer to the Environment Setup section)
- Confirm correct Bootloader mode entry (hold BOOT → plug USB → release BOOT)
- Try a different USB cable that supports data transfer
- Use
lsusb | grep "4348"to verify the device is recognized by the system
Issue 2: Computer Identifies Device as “Unknown USB Device” (HID Development)
Root Cause Analysis: USB descriptor errors, incorrect endpoint configuration, or clock frequency issues.
Solutions:
- Check that
DevDescandCfgDescbyte lengths and content are correct - Ensure VID/PID settings are reasonable and don’t conflict with known devices
- Use
lsusb -vto view the parsed device descriptors - Ensure system clock configuration is correct — USB communication is sensitive to clock accuracy
Issue 3: SWD Connection Fails
Root Cause Analysis: Incorrect wiring or target chip not powered.
Solutions:
- Check if SWCLK/SWDIO are swapped
- Ensure the target chip VCC has 3.3V power
- Check that GND is shared (common ground)
- Confirm the SWD timing delays in the debugger firmware are sufficient
Issue 4: Compilation Error “undefined identifier”
Root Cause Analysis: Wrong header file included or incorrect chip model selected.
Solutions:
- Confirm the correct header file is included:
#include <ch554.h>(modify for your actual model) - Check that the
-mcc51/-mcc52parameter in the compile command matches the target chip - Ensure function declarations and external variable definitions are complete
Issue 5: Device Keeps Disconnecting and Reconnecting
Root Cause Analysis: Insufficient current, infinite loop in code or watchdog reset, poor quality USB cable.
Solutions:
- Use a USB hub with external power
- Check code for abnormal reset logic
- Use a quality USB data cable
- Add status indicators in the USB interrupt handler to pinpoint when disconnections occur
8. Advanced Tips
Low-Power Design
If your project needs battery power, consider using the CH55x’s sleep mode:
void enter_sleep() {
    PCON |= 0x01;  // Set sleep bit
    __nop(); __nop();
}

void wake_up() {
    // Initialization code after waking up
}
USB Virtual Serial Port
The biggest advantage of the CH55x series is native USB support. Using the CDC class protocol, you can easily implement a virtual serial port for communication with host software. Complete USB device code can be found in WCH’s official examples, and there are many open-source projects on GitHub as well.
HID Macro Keyboard Extension
You can modify the HID code to have different buttons send different macro commands:
#define BTN_1 P3_0
#define BTN_2 P3_1
#define BTN_3 P3_2

if(BTN_1 == 0) {
    SendKeyReport(0x01, 0x04);  // Ctrl+A (Select All)
}
if(BTN_2 == 0) {
    SendKeyReport(0x01, 0x06);  // Ctrl+C (Copy)
}
if(BTN_3 == 0) {
    SendKeyReport(0x01, 0x07);  // Ctrl+V (Paste)
}
Just like that, you’ve built a custom macro keyboard!
9. Summary
The CH55x series MCUs are truly the kings of value for money. For budget-conscious projects, or for anyone who just wants to learn MCU development, they’re an excellent choice.
Key Selection Points Recap:
- For beginners, go with CH552 — sufficient and affordable
- For USB Host, only the CH559 will do
- For large programs, choose CH558 for its bigger Flash
- Pay attention to the differences in timer count across models
Development Advice:
- Start with the official example code and modify incrementally
- Have a USB-to-TTL module ready for debugging
- A logic analyzer is very useful — even a cheap one can solve most problems
- Browse GitHub often — there are plenty of open-source projects for reference
Building an SWD debugger with the CH552 costs less than ¥12, yet it can achieve the core functions of a commercial debugger. Of course, this approach has limitations: the maximum SWD clock is about 1MHz (limited by the CH552’s main frequency), and it doesn’t support ETM trace. But for everyday development and debugging, it’s more than adequate.
I hope this complete guide has been helpful!
Related Resources: