 ESP32
ESP32 ESP32 Multi-Core Programming: Dual-Core Task Assignment and Shared Memory Synchronization
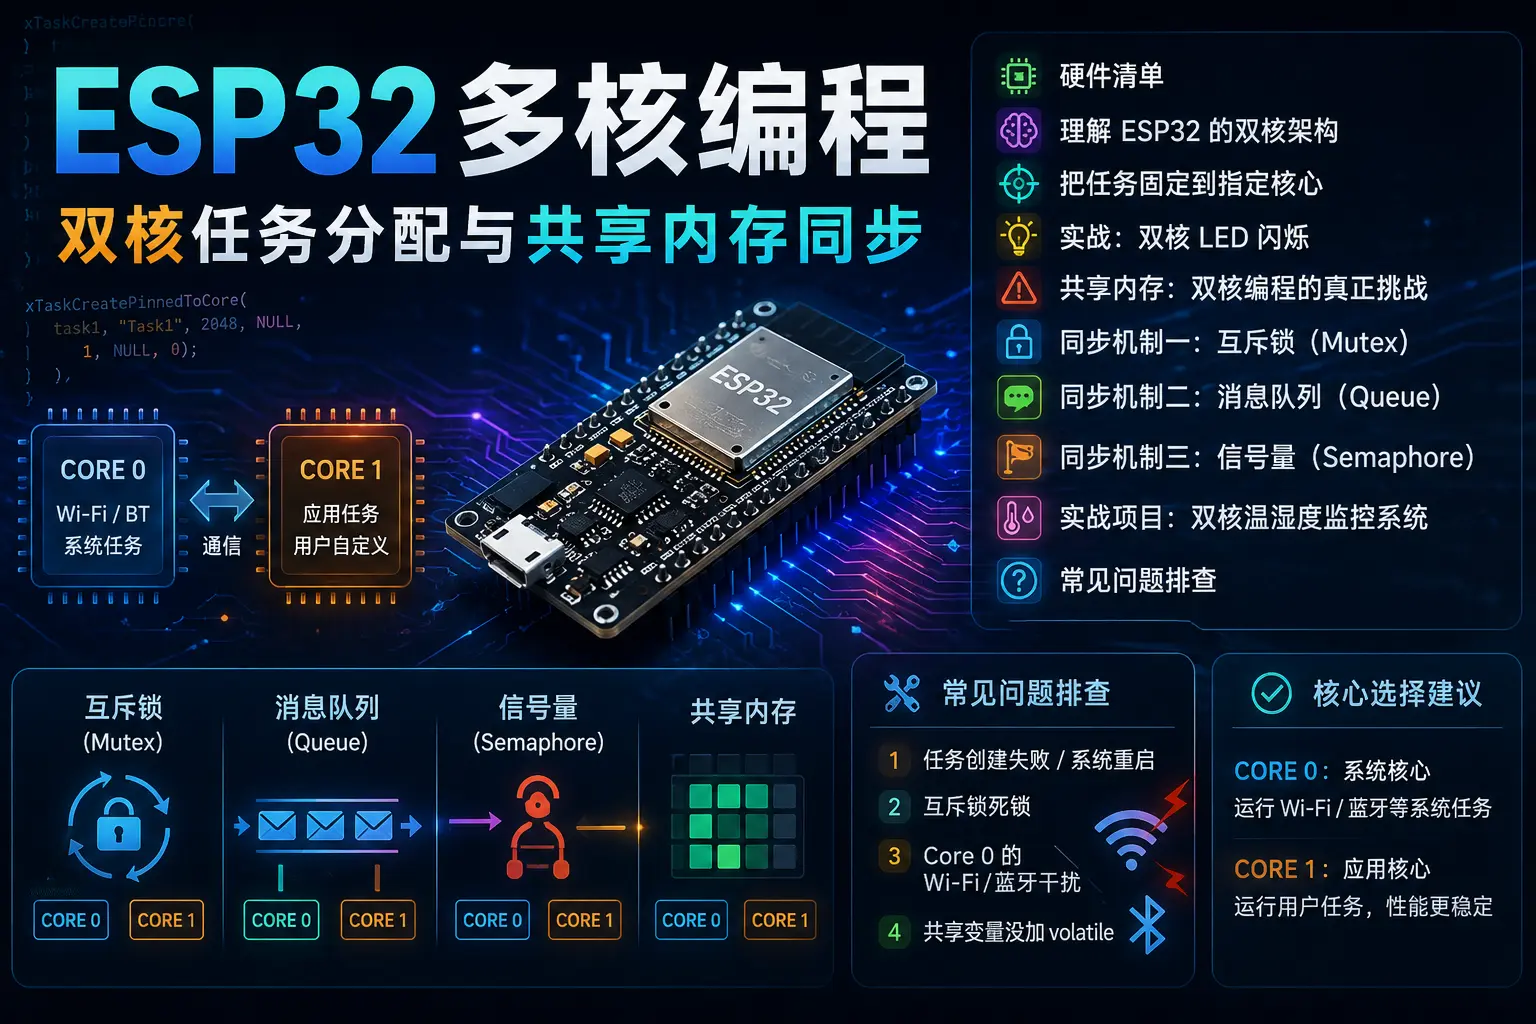
One of the biggest highlights of the ESP32 series chips is that they come equipped with a dual-core Xtensa 32-bit LX6 processor — Core 0 and Core 1. This means you can run different code on both cores simultaneously, achieving true parallel processing.
However, multi-core programming isn’t as simple as “split the code in half and run it on each core.” How do you synchronize shared data? How do you rank task priorities? How do you avoid deadlocks? This hands-on guide covers everything from architecture to code to debugging — all in one go.
Hardware List
| Item | Description |
|---|---|
| ESP32 dev board | DOIT DEVKIT V1, NodeMCU-32S, or other dual-core models (Note: ESP32-S2 and ESP32-C3 are single-core!) |
| LED × 2 | 5mm, any color, for task visualization |
| 330Ω resistor × 2 | LED current limiting |
| Breadboard + jumper wires | For quick test circuit assembly |
⚠️ Important reminder: Not all ESP32 models are dual-core! The ESP32-S2, ESP32-C3, ESP32-C6, and ESP32-H2 are all single-core chips. Always confirm the chip model before purchasing a board.
Understanding the ESP32’s Dual-Core Architecture
The two cores in the ESP32 are referred to in Espressif’s official documentation as:
| Core Number | Alias | Typical Use |
|---|---|---|
| Core 0 | PRO_CPU (Protocol CPU) | Handles Wi-Fi, Bluetooth, and other protocol stacks by default |
| Core 1 | APP_CPU (Application CPU) | The core where user code runs by default |
When you upload code using the Arduino IDE, both setup() and loop() run on Core 1 by default. You can verify this with the following code:
void setup() {
  Serial.begin(115200);
  Serial.print("setup() running on core: ");
  Serial.println(xPortGetCoreID());
}

void loop() {
  Serial.print("loop() running on core: ");
  Serial.println(xPortGetCoreID());
  delay(1000);
}
Open the serial monitor (baud rate 115200), and you’ll see all output showing core: 1.
Pinning Tasks to a Specific Core
FreeRTOS provides the xTaskCreatePinnedToCore() function, which creates a task and pins it to a specific core:
xTaskCreatePinnedToCore(
  TaskFunction,      // Task function pointer
  "TaskName",        // Task name (for debugging)
  10000,             // Stack size (bytes)
  NULL,              // Parameters passed to the task
  1,                 // Priority (0 = lowest)
  &taskHandle,       // Task handle
  0                  // Core ID: 0 = Core 0, 1 = Core 1
);
The last parameter, xCoreID, has three valid values:
0— Pinned to Core 01— Pinned to Core 1tskNO_AFFINITY— Not pinned; the scheduler assigns it freely
Hands-On: Dual-Core LED Blinking
First, wire it up: GPIO 2 to LED1, GPIO 4 to LED2 (each with a 330Ω resistor in series to GND).
TaskHandle_t Task1;
TaskHandle_t Task2;

const int led1 = 2;
const int led2 = 4;

void setup() {
  Serial.begin(115200);
  pinMode(led1, OUTPUT);
  pinMode(led2, OUTPUT);

  // Create Task 1 → Core 0, 1-second blink
  xTaskCreatePinnedToCore(
    Task1code, "Task1", 10000, NULL, 1, &Task1, 0
  );
  delay(500);

  // Create Task 2 → Core 1, 700ms blink
  xTaskCreatePinnedToCore(
    Task2code, "Task2", 10000, NULL, 1, &Task2, 1
  );
  delay(500);
}

void Task1code(void * pvParameters) {
  Serial.print("Task1 running on core: ");
  Serial.println(xPortGetCoreID());

  for(;;) {
    digitalWrite(led1, HIGH);
    delay(1000);
    digitalWrite(led1, LOW);
    delay(1000);
  }
}

void Task2code(void * pvParameters) {
  Serial.print("Task2 running on core: ");
  Serial.println(xPortGetCoreID());

  for(;;) {
    digitalWrite(led2, HIGH);
    delay(700);
    digitalWrite(led2, LOW);
    delay(700);
  }
}

void loop() {
  // The main loop also runs on Core 1
  // Leave it empty or use it for other things as needed
}
After uploading, the two LEDs will blink at different rates — they are running independently on different cores without blocking each other.
Shared Memory: The Real Challenge in Dual-Core Programming
The ESP32 uses an SMP (Symmetric Multiprocessing) architecture, where both cores share the same RAM. This means Core 0 and Core 1 can directly read and write the same global variable. But here’s the problem — if both cores modify the same variable simultaneously, the data will get corrupted. This is called a Race Condition.
// ❌ Dangerous: both cores modify simultaneously, data may be lost
volatile int sensorValue = 0;

// Core 0 task
void readSensor(void *p) {
  for(;;) {
    sensorValue = analogRead(34);  // May be read by Core 1 at the same time
    delay(10);
  }
}

// Core 1 task
void sendData(void *p) {
  for(;;) {
    // sensorValue may be in the middle of being modified when read
    Serial.println(sensorValue);
    delay(100);
  }
}
To share data safely, you must use synchronization mechanisms.
Synchronization Mechanism #1: Mutex
A mutex is like a lock — only the core that holds the lock can read or write the shared data; all other cores must wait in line.
SemaphoreHandle_t xMutex = NULL;
volatile int sensorValue = 0;

void setup() {
  Serial.begin(115200);

  // Create mutex
  xMutex = xSemaphoreCreateMutex();

  xTaskCreatePinnedToCore(readSensor, "ReadSensor", 10000, NULL, 2, NULL, 0);
  xTaskCreatePinnedToCore(sendData, "SendData", 10000, NULL, 1, NULL, 1);
}

// Core 0: Read sensor
void readSensor(void *p) {
  for(;;) {
    int val = analogRead(34);

    // Acquire lock (wait up to 100ms)
    if (xSemaphoreTake(xMutex, pdMS_TO_TICKS(100)) == pdTRUE) {
      sensorValue = val;
      xSemaphoreGive(xMutex);  // Release lock
    }

    delay(10);
  }
}

// Core 1: Send data
void sendData(void *p) {
  for(;;) {
    int val = 0;

    if (xSemaphoreTake(xMutex, pdMS_TO_TICKS(100)) == pdTRUE) {
      val = sensorValue;
      xSemaphoreGive(xMutex);
    }

    Serial.printf("Sensor: %d\n", val);
    delay(100);
  }
}

void loop() {}
Key points:
xSemaphoreTake()acquires the lock,xSemaphoreGive()releases it- Use
pdMS_TO_TICKS(milliseconds)to set the wait timeout - You must call
Giveafter acquiring the lock, or other tasks will be permanently blocked
Synchronization Mechanism #2: Message Queue
If you need to pass data between two cores rather than simply sharing a variable, a FreeRTOS message queue is the safest choice. Queues are inherently thread-safe and don’t require additional locks.
QueueHandle_t sensorQueue = NULL;

void setup() {
  Serial.begin(115200);

  // Create queue: up to 10 elements, each of type int
  sensorQueue = xQueueCreate(10, sizeof(int));

  xTaskCreatePinnedToCore(readSensor, "ReadSensor", 10000, NULL, 2, NULL, 0);
  xTaskCreatePinnedToCore(processData, "ProcessData", 10000, NULL, 1, NULL, 1);
}

// Core 0: Read sensor → send to queue
void readSensor(void *p) {
  for(;;) {
    int val = analogRead(34);

    // Send to queue (wait up to 100ms)
    if (xQueueSend(sensorQueue, &val, pdMS_TO_TICKS(100)) != pdTRUE) {
      Serial.println("Queue full!");
    }

    delay(50);
  }
}

// Core 1: Read from queue → process data
void processData(void *p) {
  int val;

  for(;;) {
    // Receive from queue (wait up to 1 second)
    if (xQueueReceive(sensorQueue, &val, pdMS_TO_TICKS(1000)) == pdTRUE) {
      // Process data
      float voltage = val * (3.3 / 4095.0);
      Serial.printf("Voltage: %.3f V\n", voltage);
    }
  }
}

void loop() {}
The advantages of queues are clear: no manual locking and unlocking required, data delivery is buffered, and you can set timeouts to avoid deadlocks.
Synchronization Mechanism #3: Semaphore
Semaphores are ideal for task synchronization — for example, having Core 1 wait until Core 0 finishes a certain operation before executing.
SemaphoreHandle_t xDataReady = NULL;
volatile int processedData = 0;

void setup() {
  Serial.begin(115200);

  // Create binary semaphore
  xDataReady = xSemaphoreCreateBinary();

  xTaskCreatePinnedToCore(core0Producer, "Producer", 10000, NULL, 2, NULL, 0);
  xTaskCreatePinnedToCore(core1Consumer, "Consumer", 10000, NULL, 1, NULL, 1);
}

// Core 0: Produce data → release semaphore
void core0Producer(void *p) {
  for(;;) {
    int val = analogRead(34);
    processedData = val;

    // Notify Core 1 that data is ready
    xSemaphoreGive(xDataReady);

    delay(200);
  }
}

// Core 1: Wait for semaphore → consume data
void core1Consumer(void *p) {
  for(;;) {
    // Block until Core 0 releases the semaphore
    if (xSemaphoreTake(xDataReady, portMAX_DELAY) == pdTRUE) {
      Serial.printf("Got data: %d\n", processedData);
    }
  }
}

void loop() {}
A Binary Semaphore has only two states — “available” and “not available” — making it suitable for simple notification scenarios. If you need counting (e.g., the producer has produced N items consecutively), use a counting semaphore with xSemaphoreCreateCounting(max, initial).
Hands-On Project: Dual-Core Temperature and Humidity Monitoring System
Below is a complete project example: Core 0 reads data from an SHT30 sensor, and Core 1 formats the data as JSON and outputs it via serial. The two cores communicate through a queue.
#include <Wire.h>
#include <ArduinoJson.h>

// SHT30 I2C address
#define SHT30_ADDR 0x44

QueueHandle_t dataQueue;
const int QUEUE_SIZE = 5;

struct SensorData {
  float temperature;
  float humidity;
  uint32_t timestamp;
};

void setup() {
  Serial.begin(115200);
  Wire.begin();

  // Create queue
  dataQueue = xQueueCreate(QUEUE_SIZE, sizeof(SensorData));

  // Initialize SHT30
  Wire.beginTransmission(SHT30_ADDR);
  Wire.write(0x2C);  // Periodic measurement mode
  Wire.write(0x06);  // Medium repeatability, 0.5Hz
  Wire.endTransmission();

  // Core 0: Read sensor
  xTaskCreatePinnedToCore(
    readSHT30, "ReadSHT30", 10000, NULL, 2, NULL, 0
  );

  // Core 1: Output JSON
  xTaskCreatePinnedToCore(
    outputJSON, "OutputJSON", 10000, NULL, 1, NULL, 1
  );
}

void readSHT30(void *p) {
  uint8_t buf[6];
  SensorData data;

  for(;;) {
    Wire.requestFrom(SHT30_ADDR, 6);
    if (Wire.available() == 6) {
      for (int i = 0; i < 6; i++) {
        buf[i] = Wire.read();
      }

      // Calculate temperature
      int rawTemp = (buf[0] << 8) | buf[1];
      data.temperature = -45.0 + 175.0 * rawTemp / 65535.0;

      // Calculate humidity
      int rawHum = (buf[3] << 8) | buf[4];
      data.humidity = 100.0 * rawHum / 65535.0;

      data.timestamp = millis();

      // Send to queue
      if (xQueueSend(dataQueue, &data, pdMS_TO_TICKS(500)) != pdTRUE) {
        Serial.println("[Core0] Queue full, data dropped");
      }
    }

    delay(2000);  // 0.5Hz sampling
  }
}

void outputJSON(void *p) {
  SensorData data;

  for(;;) {
    if (xQueueReceive(dataQueue, &data, pdMS_TO_TICKS(5000)) == pdTRUE) {
      // Build JSON
      StaticJsonDocument<200> doc;
      doc["temp"] = data.temperature;
      doc["humidity"] = data.humidity;
      doc["ts"] = data.timestamp;

      char json[128];
      serializeJson(doc, json);

      Serial.printf("[Core1] %s\n", json);
    }
  }
}

void loop() {}
This project has a clean architecture:
- Core 0 is dedicated to sensor reading, unaffected by serial output
- Core 1 is dedicated to data processing and formatting
- The queue serves as a safe cross-core communication channel, buffering up to 5 data entries
Common Troubleshooting
1. Task Creation Failure / System Restart
Symptom: The ESP32 restarts or triggers a Guru Meditation Error after calling xTaskCreatePinnedToCore().
Cause: Insufficient stack space. FreeRTOS task stacks are relatively small by default. If your task involves heavy stack consumers like Serial.printf or ArduinoJson, 10000 bytes may not be enough.
Solution: Increase the stack size to 20000 or higher, and use uxTaskGetStackHighWaterMark() to check actual usage:
// Periodically check stack margin inside a task
UBaseType_t highWater = uxTaskGetStackHighWaterMark(NULL);
Serial.printf("Stack remaining: %u bytes\n", highWater);
2. Mutex Deadlock
Symptom: The system freezes with no serial output.
Cause: Task A acquires the lock and waits for a signal from Task B; Task B also tries to acquire the same lock — both wait for each other, and neither can proceed.
Solution:
- Use timeouts:
xSemaphoreTake(mutex, pdMS_TO_TICKS(100))instead of waiting forever - Keep lock acquisition order consistent (all tasks acquire multiple locks in the same order)
- Avoid calling potentially blocking functions (like
delay()or serial output) while holding a lock
3. Wi-Fi/Bluetooth Interference on Core 0
Symptom: Wi-Fi connection becomes unstable after pinning a task to Core 0.
Cause: Core 0 runs the Wi-Fi/Bluetooth protocol stack by default. If your task consumes too much CPU time, the protocol stack gets squeezed out.
Solution:
- Place user tasks on Core 1
- Set lower priority (0–1) for tasks on Core 0
- Use
vTaskDelay()to voluntarily yield CPU time slices
4. Shared Variable Missing volatile
Symptom: One core modifies a variable, but the other core still reads the old value.
Cause: The compiler optimization may cache the variable in a register.
Solution: Global variables shared across cores must use the volatile keyword:
volatile int sharedCounter = 0;  // ✅ Correct
int sharedCounter = 0;           // ❌ May be optimized away
Core Selection Guidelines
| Scenario | Recommended Core | Reason |
|---|---|---|
| Sensor reading | Core 0 | Close to peripherals; doesn’t affect user logic |
| Data processing / algorithms | Core 1 | More available CPU resources |
| Wi-Fi/Bluetooth communication | Core 0 (let the system handle it) | Protocol stack runs on Core 0 by default |
| UI refresh / display | Core 1 | Doesn’t interfere with the network protocol stack |
| Background logging | Core 1, low priority | Doesn’t affect main logic |
Golden rule: Reserve Core 0 for system and peripheral tasks; run your business logic on Core 1. If Core 0 has spare compute capacity, then assign lightweight tasks to it.
Summary
Key takeaways for ESP32 dual-core programming:
- Use
xTaskCreatePinnedToCore()to assign cores — the last parameter determines which CPU the task runs on - Shared data must be synchronized — use mutexes to protect variables, message queues to pass data, and semaphores to synchronize tasks
- Allocate enough stack space — increase it if needed, and monitor with
uxTaskGetStackHighWaterMark() - Core 0 runs the system protocol stack — don’t run high-priority, heavy-load tasks on it
- Don’t forget
volatile— it’s required for cross-core shared variables
Master these, and your ESP32 projects can upgrade from single-core “single-threaded” operation to true dual-core parallel processing, with noticeable improvements in performance and responsiveness. Give it a try!