 Embedded Development
 FreeRTOS Task Scheduling Explained in Detail: Multi-Task Embedded System Practice
From bare-metal while(1) to FreeRTOS multi-task scheduling, it’s time to upgrade your embedded development!
Students doing embedded development will eventually encounter a problem: I have this chip, and I need to do several things at the same time - collect sensor data, respond to button presses, drive screen refreshes, send data over the network… Stuff everything into a single while(1) loop, the code gets messier and messier, eventually becoming the legendary “spaghetti code.”
Today’s article discusses how to solve this problem - using FreeRTOS task scheduling mechanism to keep your multi-task embedded system organized.
What is FreeRTOS?
FreeRTOS is an open-source real-time operating system (RTOS) kernel with extremely small code size (less than 10KB after compression), designed specifically for microcontrollers. It’s widely ported to various MCUs - STM32, ESP32, NXP, Renesas, etc. Basically, any development board you can name can run it.
Unlike general-purpose operating systems (like Linux, Windows), FreeRTOS doesn’t pursue “big and complete.” Its core only has two things: task scheduling and inter-task communication. Other features can be added as needed.
FreeRTOS’s position on ESP32: ESP-IDF integrates FreeRTOS kernel by default (v10.5.1 with SMP multi-core modifications), every application you write in ESP-IDF actually runs under FreeRTOS scheduling.
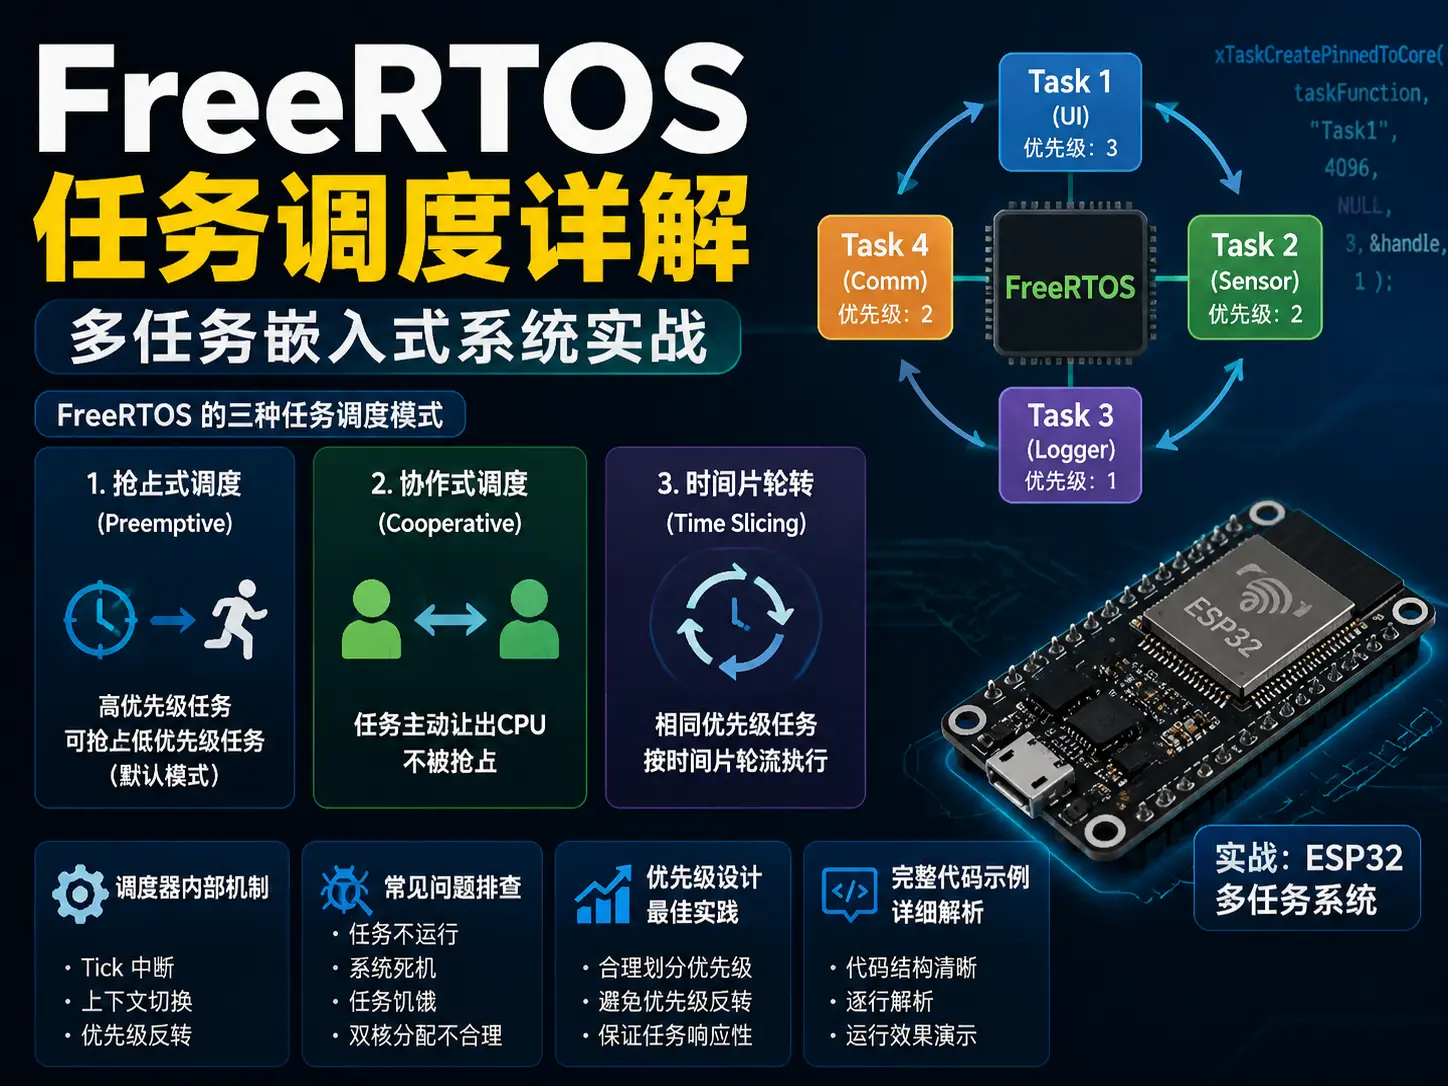
FreeRTOS Three Task Scheduling Modes
FreeRTOS supports three scheduling strategies. Understanding them is the foundation for using FreeRTOS well.
1. Preemptive Scheduling — Default Mode
This is FreeRTOS’s most commonly used and most powerful scheduling method. The rule is simple: high-priority tasks can preempt low-priority tasks’ CPU time at any time.
For example: you have a sensor collection task with priority 2 running, suddenly a button interrupt handler task with priority 5 becomes ready - FreeRTOS will immediately pause the collection task, switch to execute the button task. After the button task completes (enters blocked or suspended state), the collection task will resume.
// Create high-priority task - emergency event handling
xTaskCreate(
    EmergencyHandlerTask,   // Task function
    "EmergencyHandler",     // Task name
    2048,                   // Stack size (bytes)
    NULL,                   // Parameters
    5,                      // Priority (higher number = higher priority)
    NULL                    // Task handle
);

// Create low-priority task - sensor polling
xTaskCreate(
    SensorPollTask,
    "SensorPoll",
    2048,
    NULL,
    2,                      // Low priority
    NULL
);
Key characteristics of preemptive scheduling:
-
When high-priority task is ready, it immediately gets CPU
-
Same-priority tasks don’t preempt each other, rely on time-slicing (see below)
-
Suitable for scenarios with high real-time requirements - like motor control, safety monitoring
2. Cooperative Scheduling
In this mode, tasks won’t be preempted, only when the task itself yields CPU (calls taskYIELD()), will the scheduler switch tasks.
void CooperativeTask(void *pvParameters) {
    for (;;) {
        // Do some work
        do_sensor_reading();

        // Actively yield CPU, let other tasks have a chance to run
        taskYIELD();
    }
}
The advantage of cooperative scheduling is simplicity and controllability - you know exactly when task switching will happen. The disadvantage is: if a task forgets to call taskYIELD(), other tasks will never get CPU.
Practical application recommendation: Unless you have special requirements, don’t use cooperative scheduling. Preemptive is the right way.
3. Time Slicing — Fair Way for Same-Priority Tasks
When multiple tasks have the same priority, FreeRTOS automatically uses time-slicing mechanism. Each task runs for a fixed time slice (tick), after the time slice is used up, it automatically switches to the next same-priority task.
Time slice length is determined by configTICK_RATE_HZ. In ESP-IDF, default tick frequency is 1000 Hz, meaning 1 tick = 1 millisecond.
┌─────────────┐
│ Tick 0      │ → Task A runs
├─────────────┤
│ Tick 1      │ → Task B runs (time-slicing)
├─────────────┤
│ Tick 2      │ → Task C runs
├─────────────┤
│ Tick 3      │ → Back to Task A...
└─────────────┘
Time-slicing is very suitable for handling multiple tasks with same priority and equal importance - like collecting three sensors of the same type simultaneously.
Practice: ESP32 Multi-Task System Complete Example
Below we use an actual project to demonstrate FreeRTOS task scheduling - an environmental monitoring station that needs to do the following simultaneously:
| Task | Priority | Description |
|---|---|---|
| WiFi data upload | 4 | Send data to cloud server via network |
| Sensor collection | 3 | Read temperature/humidity, barometric pressure sensors |
| Button response | 5 | Handle user button presses (highest priority) |
| LED status indication | 1 | Blink LED to indicate system status |
Hardware List
-
ESP32 development board (ESP32-WROOM-32, dual-core 240MHz)
-
DHT22 temperature/humidity sensor (GPIO4)
-
BMP280 barometric pressure sensor (I2C: SDA=GPIO21, SCL=GPIO22)
-
Button (GPIO0, active low)
-
LED (GPIO2, system status indication)
Complete Code
#include <stdio.h>
#include "freertos/FreeRTOS.h"
#include "freertos/task.h"
#include "freertos/queue.h"
#include "driver/gpio.h"
#include "esp_log.h"

static const char *TAG = "monitor_station";

// ---- Queue: inter-task communication ----
// Sensor data passed to upload task via queue
typedef struct {
    float temperature;
    float humidity;
    float pressure;
} SensorData_t;

QueueHandle_t sensor_data_queue;

// ---- GPIO initialization ----
void gpio_init(void) {
    gpio_reset_pin(GPIO_NUM_2);  // LED
    gpio_set_direction(GPIO_NUM_2, GPIO_MODE_OUTPUT);

    gpio_reset_pin(GPIO_NUM_0);  // Button
    gpio_set_direction(GPIO_NUM_0, GPIO_MODE_INPUT);
    gpio_set_pull_mode(GPIO_NUM_0, GPIO_PULLUP_ONLY);
}

// ---- Task 1: Sensor collection (priority 3) ----
void SensorPollTask(void *pvParameters) {
    SensorData_t data;

    for (;;) {
        // Simulate reading sensor data
        data.temperature = 25.0f + (rand() % 100) / 10.0f;
        data.humidity    = 60.0f + (rand() % 200) / 10.0f;
        data.pressure    = 1013.0f + (rand() % 50) / 10.0f;

        // Send to queue (wait 100ms, discard if queue full)
        if (xQueueSend(sensor_data_queue, &data, pdMS_TO_TICKS(100)) != pdPASS) {
            ESP_LOGW(TAG, "Sensor data queue full, discarding");
        }

        ESP_LOGI(TAG, "Collected: %.1f°C, %.1f%%, %.1fhPa",
                 data.temperature, data.humidity, data.pressure);

        // Collect once every 2 seconds
        vTaskDelay(pdMS_TO_TICKS(2000));
    }
}

// ---- Task 2: WiFi data upload (priority 4) ----
void WiFiUploadTask(void *pvParameters) {
    SensorData_t data;

    for (;;) {
        // Wait for data from queue (infinite wait, block if no data)
        if (xQueueReceive(sensor_data_queue, &data, portMAX_DELAY) == pdPASS) {
            // Simulate upload to cloud
            ESP_LOGI(TAG, "Uploading data: temp=%.1f, hum=%.1f, press=%.1f",
                     data.temperature, data.humidity, data.pressure);

            // In actual project, call HTTP/MQTT send here
            // http_post_to_cloud(&data);
        }
    }
}

// ---- Task 3: Button response (priority 5 — highest!) ----
void ButtonTask(void *pvParameters) {
    int button_count = 0;

    for (;;) {
        if (gpio_get_level(GPIO_NUM_0) == 0) {
            // Debounce: wait 50ms then check again
            vTaskDelay(pdMS_TO_TICKS(50));

            if (gpio_get_level(GPIO_NUM_0) == 0) {
                button_count++;
                ESP_LOGI(TAG, "Button pressed #%d (immediate response!)", button_count);

                // Wait for button release
                while (gpio_get_level(GPIO_NUM_0) == 0) {
                    vTaskDelay(pdMS_TO_TICKS(10));
                }
            }
        }

        vTaskDelay(pdMS_TO_TICKS(10));  // Short delay to release CPU
    }
}

// ---- Task 4: LED status indication (priority 1 — lowest) ----
void LEDTask(void *pvParameters) {
    int led_state = 0;

    for (;;) {
        led_state = !led_state;
        gpio_set_level(GPIO_NUM_2, led_state);

        // 1 Hz blink
        vTaskDelay(pdMS_TO_TICKS(500));
    }
}

// ---- Main function ----
void app_main(void) {
    ESP_LOGI(TAG, "=== Environmental monitoring station starting ===");

    // Initialize GPIO
    gpio_init();

    // Create queue (cache up to 5 data sets)
    sensor_data_queue = xQueueCreate(5, sizeof(SensorData_t));

    // Create four tasks
    xTaskCreatePinnedToCore(ButtonTask, "Button", 2048, NULL, 5, NULL, 1);
    xTaskCreatePinnedToCore(WiFiUploadTask, "WiFiUpload", 4096, NULL, 4, NULL, 0);
    xTaskCreatePinnedToCore(SensorPollTask, "SensorPoll", 2048, NULL, 3, NULL, 1);
    xTaskCreatePinnedToCore(LEDTask, "LED", 1024, NULL, 1, NULL, 0);

    ESP_LOGI(TAG, "All tasks created, scheduler starts running");
}
Code Analysis
Why use xTaskCreatePinnedToCore instead of xTaskCreate?
ESP32 is a dual-core chip, xTaskCreatePinnedToCore allows you to specify which core a task runs on:
-
Core 0: WiFi upload + LED (I/O intensive)
-
Core 1: Button response + sensor collection (high real-time requirements)
This fully utilizes dual-core performance, avoiding high-priority button tasks being blocked by WiFi network operations.
Why is button task priority highest (5)?
User experience first! Button response delay exceeding 200ms is noticeably “laggy” to users. Give it highest priority to ensure buttons are responded to immediately regardless of what other tasks are doing.
Why use Queue instead of global variables?
Queue is FreeRTOS’s thread-safe inter-task communication mechanism:
-
Automatically handles concurrent access (no manual locking needed)
-
Supports blocking wait (
xQueueReceiveautomatically suspends task when queue is empty, doesn’t waste CPU) -
Has timeout protection (
xQueueSendwon’t wait forever when queue is full)
Deep Understanding: How Does FreeRTOS Scheduler Work Internally?
FreeRTOS scheduler’s core is a Ready List, which organizes all ready tasks by priority.
Scheduler Tick Interrupt
FreeRTOS relies on hardware timer to generate periodic Tick interrupts. Each time Tick interrupt triggers, the scheduler will:
-
Increment system Tick counter: Records how long the system has been running, used for
vTaskDelay, timeouts, and other time-related functions. -
Check if delayed tasks are due: Traverse delayed list, change due tasks’ state from “delayed” to “ready”, add to corresponding priority ready queue.
-
Execute time-slicing: If multiple same-priority tasks are in ready state, scheduler moves ready pointer to next task, implementing fair time-slice allocation.
-
Determine if context switch is needed: If highest-priority ready task changes (e.g., higher priority task just became due), trigger PendSV interrupt, execute context switch.
Context Switch
When scheduler decides to switch tasks, it will:
Save current task's CPU registers → Find next task to run → Restore that task's registers → Continue executionThis process is very fast, usually completed within a few microseconds. ESP32 uses hardware-assisted context switch, more efficient than pure software implementation.
Priority Inversion Problem
This is a classic pitfall that must be known in real-time system development:
Task A (low priority) holds lock → Task B (medium priority) preempts A → Task C (high priority) also wants to acquire lock, but is blocked by B → C is stuck by B, while B is stuck by A… High priority task is indirectly blocked by low priority task!
FreeRTOS’s solution: Priority Inheritance**
Use mutex instead of binary semaphore:
SemaphoreHandle_t data_mutex = xSemaphoreCreateMutex();

// Acquire mutex (automatically enables priority inheritance)
if (xSemaphoreTake(data_mutex, portMAX_DELAY) == pdTRUE) {
    // Access shared resource
    shared_resource_access();
    xSemaphoreGive(data_mutex);  // Release lock
}
When high-priority task waits for mutex, the low-priority task holding the lock will temporarily inherit high priority, thus completing execution and releasing the lock as quickly as possible.
Common Problem Troubleshooting
Problem 1: Task doesn’t run after creation
Symptom: xTaskCreate returns pdPASS, but task function isn’t executed at all.
Troubleshooting checklist:
-
Priority set to 0: Priority 0 is idle task level, only runs when no higher priority tasks are ready. Confirm priority parameter > 0.
-
Task function written incorrectly: Check if function pointer passed to
xTaskCreateis correct - common pitfall is passing function call (with parentheses) instead of function pointer. -
Task has infinite loop or permanent blocking inside: Task function may have infinite loop with no exit point, or called APIs like
vTaskDelay(portMAX_DELAY)causing permanent blocking, preventing task from progressing.
// Check task stack usage (smaller return value means more stack used)
UBaseType_t watermark = uxTaskGetStackHighWaterMark(my_task_handle);
ESP_LOGI(TAG, "Task remaining stack space: %d bytes", watermark * 4);
Problem 2: System crashes after running for a while
Most common causes:
-
Stack overflow: Some task’s stack is insufficient, overwriting adjacent memory
-
Heap fragmentation: Frequent task creation/deletion causes heap fragmentation
-
Deadlock: Two tasks waiting for each other to release locks
Debugging tips: Enable FreeRTOS stack overflow detection:
// Enable in FreeRTOSConfig.h
#define configCHECK_FOR_STACK_OVERFLOW  2
Method 2 will call vApplicationStackOverflowHook() when stack overflows, you can print current task information in this hook:
void vApplicationStackOverflowHook(TaskHandle_t xTask, char *pcTaskName) {
    ESP_LOGE(TAG, "Stack overflow! Task name: %s", pcTaskName);
    while (1);  // Hang, wait for debugger
}
Problem 3: Improper task priority setting causes “starvation”
Low-priority tasks never get executed - because high-priority tasks keep running, never completely blocking.
Solution: Ensure every task has blocking points (vTaskDelay, xQueueReceive, xSemaphoreTake, etc.), actively yielding CPU time.
Problem 4: Unreasonable ESP32 dual-core task allocation
Putting WiFi operations and sensor collection on the same core, WiFi’s blocking calls will affect sensor real-time performance.
Recommendation:
-
Core 0: Network, file I/O and other blocking operations
-
Core 1: Sensor collection, control logic and other real-time tasks
-
Use
xTaskCreatePinnedToCore()to explicitly specify
Task Priority Design Best Practices
Based on years of embedded development experience, here’s a universal priority design scheme:
Priority 7 (highest) ──── Watchdog feeding, safety-critical interrupt handling
Priority 6 ──────────── Motor control, emergency stop logic
Priority 5 ──────────── User input handling (buttons, touch screen)
Priority 4 ──────────── Network communication, data upload
Priority 3 ──────────── Sensor data collection
Priority 2 ──────────── Data processing, filtering, calculation
Priority 1 ──────────── UI refresh, LED indication, log output
Priority 0 (lowest) ──── Idle task, system maintenance
Core principles:
-
Real-time first: Give highest priority to latency-sensitive tasks (buttons, safety protection, motor control), put delay-tolerant tasks like UI refresh and logs at lower priority.
-
Avoid too many priorities: 4-6 priority levels are enough for actual projects. Too many levels increase debugging difficulty, easily introducing priority inversion and starvation issues.
-
High-priority tasks must have blocking points: If high-priority task stays ready (busy loop), low-priority tasks will never get CPU. Must use
vTaskDelay, queue receive and other mechanisms to regularly yield CPU. -
Reserve highest priority for safety-critical functions: Watchdog feeding, hardware fault detection should occupy highest priority, ensuring immediate response in abnormal situations.
Final Thoughts
FreeRTOS task scheduling mechanism looks simple, but there are many pitfalls in actual use - stack size, priority allocation, inter-task communication method selection, each relates to system stability.
Recommend beginners first run the example code above on ESP32, experience how multi-task scheduling works. Then gradually add more tasks, observe scheduler behavior. Practice brings true knowledge, more effective than reading ten tutorials.
Next article preview: We’ll dive deep into FreeRTOS task synchronization mechanisms - practical usage of semaphores, mutexes, and event groups, stay tuned!
What do you find most difficult about getting started with FreeRTOS? Welcome to share your pitfall experiences in the comments 👇