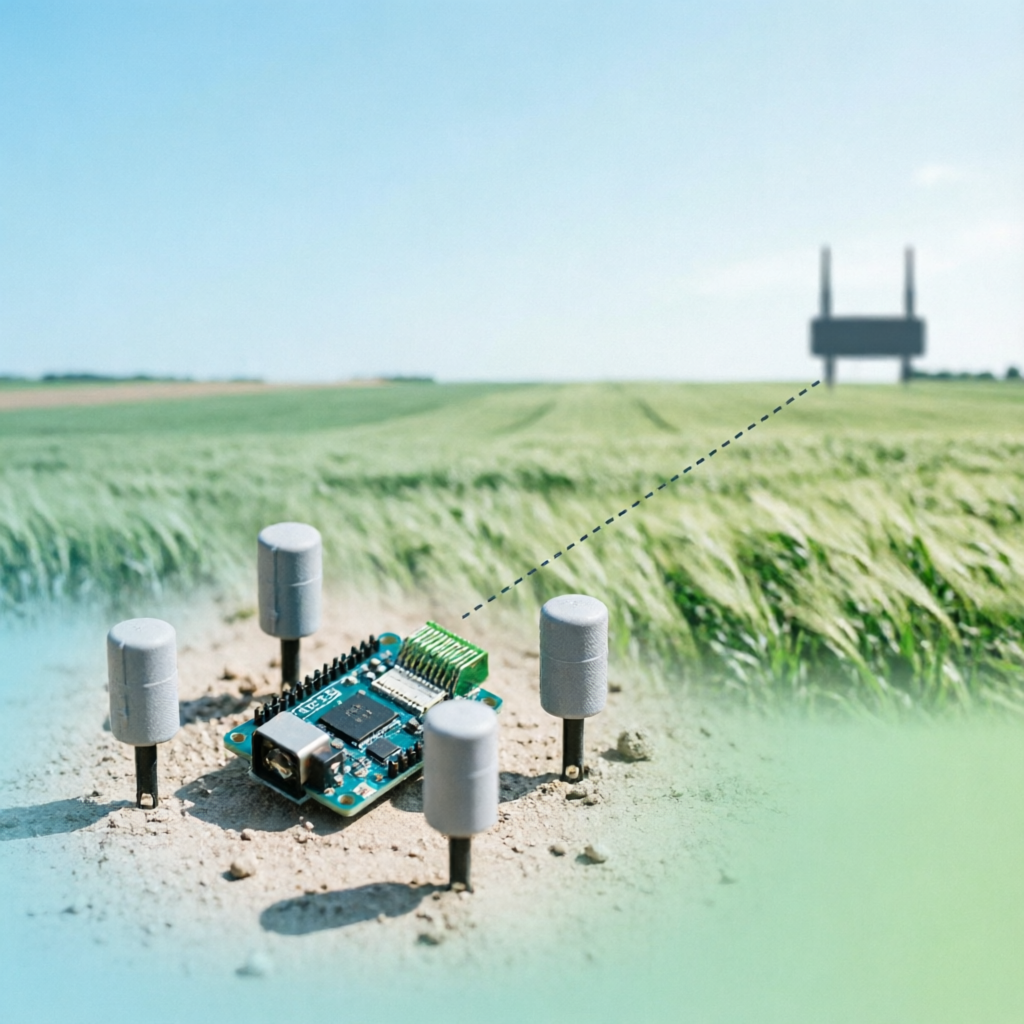
 IoT
IoT Millimeter Wave Radar Sensor RCWL-0516: Human Presence Detection in Practice
Have you ever experienced this: you’re sitting at your desk completely still, and the sensor decides “nobody’s here” and turns off the lights?
That’s the classic problem with traditional PIR (Passive Infrared) sensors — they detect changes in body heat. If you don’t move, they go “blind.”
The RCWL-0516 millimeter wave radar sensor we’re discussing today solves exactly this pain point. It uses Doppler radar principles — as long as you’re there, even if you’re just dozing off or breathing lightly, it can detect you.
In this article, we’ll go from theory to practice, building a complete human presence detection system with Arduino and ESP32.
What is the RCWL-0516?
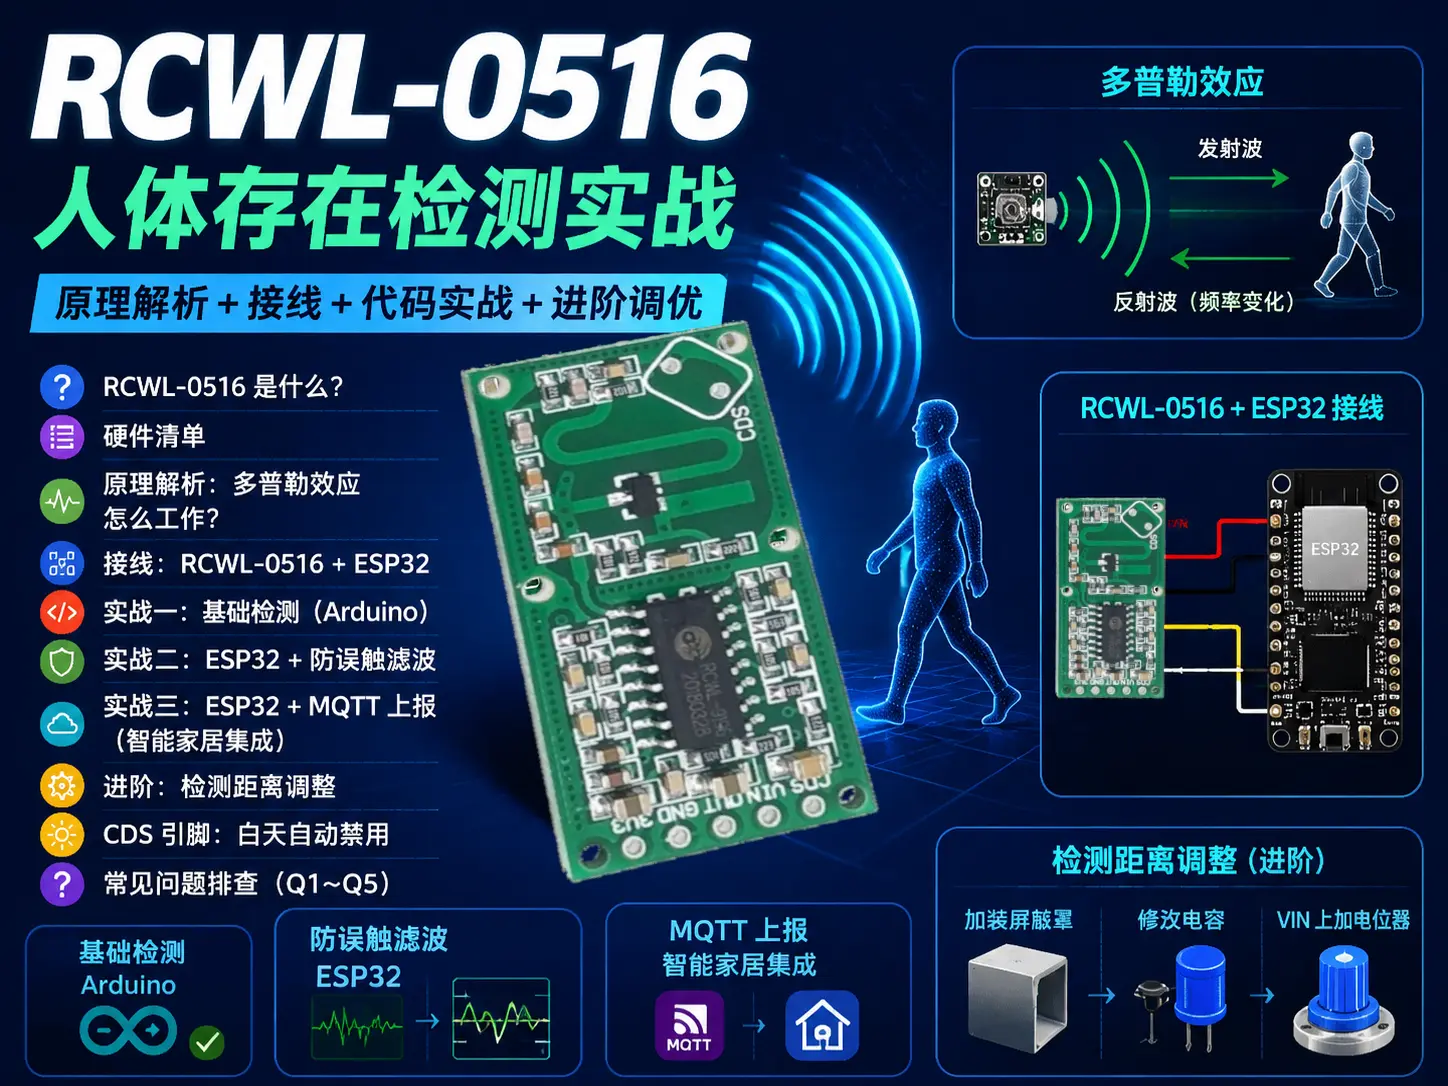
The RCWL-0516 is a motion detection module based on 3.15 GHz microwave Doppler radar. It works by transmitting microwave signals and receiving reflected signals, comparing the frequency difference (Doppler shift) between the two to determine if an object is moving.
Compared to PIR infrared sensors, millimeter wave radar has several clear advantages:
| Feature | RCWL-0516 Radar | PIR Infrared |
|---|---|---|
| Detection Principle | Doppler microwave | Infrared thermal radiation change |
| Penetration | Can penetrate plastic, wood, thin walls | Cannot penetrate, requires line of sight |
| Static Detection | Can detect micro-movements like breathing | Quickly determines “no one” after stillness |
| Detection Range | 5-7 meters adjustable | Typically 3-5 meters |
| Temperature Impact | Unaffected by ambient temperature | Sensitivity decreases in high temperature |
| Concealed Installation | Can hide behind ceiling/walls | Needs to be exposed |
Hardware Checklist
| Component | Quantity | Description |
|---|---|---|
| RCWL-0516 sensor module | 1 | Core detection module |
| ESP32 development board | 1 | Main controller (Arduino Uno also works) |
| Breadboard + jumper wires | Several | For wiring |
| LED module | 1 | Status indicator (or use onboard LED) |
| 100kΩ resistor | 1 | Optional, for adjusting detection range |
| USB data cable | 1 | For power and programming |
The RCWL-0516 module has 5 pins:
+---+
|   |
| 3V3  ← 3.3V output (can power external devices)
| VIN  ← 4-28V power input
| GND  ← Ground
| OUT  ← Digital output: target detected = HIGH(3.3V), no target = LOW(0V)
| CDS  ← Photoresistor input: add resistor or photosensitive element to disable during daytime
+---+
How It Works: The Doppler Effect
The core principle of the RCWL-0516 isn’t complicated — in one sentence: transmit → reflect → detect frequency shift.
- The microwave oscillator inside the module generates a continuous wave at 3.15 GHz
- The electromagnetic waves radiate outward through the PCB antenna
- When hitting a moving object, the reflected wave frequency changes (Doppler shift)
- Internal circuitry compares the frequency difference between transmitted and reflected waves
- If the frequency difference exceeds a threshold, it determines “motion detected” and the OUT pin outputs HIGH
Doppler shift formula:
Δf = 2 × v × f₀ / cWhere v is target velocity, f₀ is transmission frequency, and c is the speed of light. Even when your chest rises and falls only a few millimeters during breathing, this tiny velocity change is amplified by the 3.15 GHz electromagnetic waves, producing a detectable frequency difference.
This is why the RCWL-0516 can detect people who are “almost motionless.”
Wiring: RCWL-0516 + ESP32
Wiring is very simple — just three wires:
RCWL-0516          ESP32
  VIN      ────▶   3.3V (or 5V)
  GND      ────▶   GND
  OUT      ────▶   GPIO4 (any digital pin)
CDS ────▶ Floating or connect photoresistorNote: The RCWL-0516’s VIN supports 4-28V wide voltage input, but when using ESP32, connecting directly to 3.3V also works (the module has internal voltage regulation). If connected to 5V, detection sensitivity will be slightly higher.
Practice 1: Basic Detection (Arduino)
The most basic usage: detect presence → print to serial + light up LED.
// RCWL-0516 Basic Human Presence Detection
// Hardware: RCWL-0516 + Arduino Uno
const int SENSOR_PIN = 2;  // RCWL-0516 OUT to Arduino D2
const int LED_PIN = 13;    // Onboard LED

void setup() {
  Serial.begin(115200);
  pinMode(SENSOR_PIN, INPUT);
  pinMode(LED_PIN, OUTPUT);

  Serial.println("RCWL-0516 Human Presence Detection Starting...");
  Serial.println("Waiting for sensor initialization...");
  delay(3000);  // Give sensor 3 seconds to initialize
}

void loop() {
  int sensorValue = digitalRead(SENSOR_PIN);

  if (sensorValue == HIGH) {
    digitalWrite(LED_PIN, HIGH);
    Serial.println("[PRESENT] Human activity detected!");
  } else {
    digitalWrite(LED_PIN, LOW);
    Serial.println("[ABSENT] No one detected");
  }

  delay(500);  // 500ms sampling interval
}
Once this code is running, if you wave your hand in front of the sensor, walk around, or even just sit and move a finger, the serial port will print [PRESENT].
Practice 2: ESP32 + Anti-False-Trigger Filtering
The RCWL-0516 has a common issue: the output signal sometimes jitters, switching HIGH-LOW repeatedly in short periods. We solve this with simple time window filtering.
// RCWL-0516 ESP32 Version: With Anti-False-Trigger Filtering
const int SENSOR_PIN = 4;     // OUT to GPIO4
const int LED_PIN = 2;        // Onboard LED
const int LED_BUILTIN = 13;

// Filtering parameters
const unsigned long PRESENCE_CONFIRM_MS = 2000;   // Confirm "someone present" requires 2 seconds continuous
const unsigned long ABSENCE_CONFIRM_MS = 10000;   // Confirm "no one" requires 10 seconds continuous

bool currentState = false;        // Current determined presence state
unsigned long lastChangeTime = 0; // Last state change time

void setup() {
  Serial.begin(115200);
  pinMode(SENSOR_PIN, INPUT);
  pinMode(LED_PIN, OUTPUT);
  pinMode(LED_BUILTIN, OUTPUT);

  Serial.println("=== RCWL-0516 ESP32 Human Presence Detection ===");
  Serial.println("Anti-false-trigger filtering enabled");
  delay(3000);
}

void loop() {
  bool rawSignal = (digitalRead(SENSOR_PIN) == HIGH);
  unsigned long now = millis();

  if (rawSignal && !currentState) {
    // Detected "someone" signal from "no one" state
    if (now - lastChangeTime >= PRESENCE_CONFIRM_MS) {
      currentState = true;
      Serial.println("[✅ CONFIRMED] Human presence detected!");
      digitalWrite(LED_PIN, HIGH);
      digitalWrite(LED_BUILTIN, HIGH);
      lastChangeTime = now;
    }
  }
  else if (!rawSignal && currentState) {
    // Detected "no one" signal from "someone" state
    if (now - lastChangeTime >= ABSENCE_CONFIRM_MS) {
      currentState = false;
      Serial.println("[❌ CONFIRMED] Human has left");
      digitalWrite(LED_PIN, LOW);
      digitalWrite(LED_BUILTIN, LOW);
      lastChangeTime = now;
    }
  }

  // Reset timer when signal matches current state
  if (rawSignal == currentState) {
    lastChangeTime = now;
  }

  delay(100);
}
The logic of this code:
- Must detect HIGH continuously for 2 seconds to determine “someone present” (prevents false triggers)
- Must detect LOW continuously for 10 seconds to determine “no one has left” (prevents breathing gaps from being misjudged as departure)
- Timer resets each time the signal matches the current state
You can adjust these two time thresholds based on your actual environment.
Practice 3: ESP32 + MQTT Reporting (Smart Home Integration)
This is where it gets truly useful — sending detection results to an MQTT Broker for Home Assistant or other smart home platforms to handle.
// RCWL-0516 + ESP32 + MQTT → Smart Home Human Presence Sensor
#include <WiFi.h>
#include <PubSubClient.h>

// WiFi configuration
const char* ssid = "YOUR_WIFI_SSID";
const char* password = "YOUR_WIFI_PASSWORD";

// MQTT configuration
const char* mqtt_server = "192.168.1.100";  // Your MQTT Broker address
const int mqtt_port = 1883;
const char* mqtt_user = "mqtt_user";
const char* mqtt_password = "mqtt_password";

const int SENSOR_PIN = 4;
const char* mqtt_topic_presence = "home/sensor/presence/office";

WiFiClient espClient;
PubSubClient mqttClient(espClient);

// Filtering
bool presenceState = false;
unsigned long stateChangeTime = 0;
const unsigned long ON_DELAY = 2000;
const unsigned long OFF_DELAY = 10000;

void setup() {
  Serial.begin(115200);
  pinMode(SENSOR_PIN, INPUT);

  // Connect WiFi
  WiFi.begin(ssid, password);
  Serial.print("Connecting to WiFi");
  while (WiFi.status() != WL_CONNECTED) {
    delay(500);
    Serial.print(".");
  }
  Serial.println("\nWiFi connected!");

  // Configure MQTT
  mqttClient.setServer(mqtt_server, mqtt_port);
  mqttClient.setKeepAlive(30);

  connectMQTT();
  delay(3000);  // Sensor initialization
}

void connectMQTT() {
  while (!mqttClient.connected()) {
    String clientId = "ESP32-Presence-" + String(random(0xffff), HEX);
    if (mqttClient.connect(clientId.c_str(), mqtt_user, mqtt_password)) {
      Serial.println("MQTT connected");
      // Publish offline status
      mqttClient.publish(mqtt_topic_presence, "OFFLINE", true);  // retain
    } else {
      Serial.print("MQTT connection failed, rc=");
      Serial.println(mqttClient.state());
      delay(3000);
    }
  }
}

void loop() {
  if (!mqttClient.connected()) {
    connectMQTT();
  }
  mqttClient.loop();

  bool raw = (digitalRead(SENSOR_PIN) == HIGH);
  unsigned long now = millis();

  if (raw && !presenceState) {
    if (now - stateChangeTime >= ON_DELAY) {
      presenceState = true;
      mqttClient.publish(mqtt_topic_presence, "ONLINE", true);
      Serial.println("[MQTT] Published: ONLINE (someone present)");
      stateChangeTime = now;
    }
  }
  else if (!raw && presenceState) {
    if (now - stateChangeTime >= OFF_DELAY) {
      presenceState = false;
      mqttClient.publish(mqtt_topic_presence, "OFFLINE", true);
      Serial.println("[MQTT] Published: OFFLINE (no one)");
      stateChangeTime = now;
    }
  }

  if (raw == presenceState) {
    stateChangeTime = now;
  }

  delay(100);
}
In Home Assistant, you can use MQTT Discovery to automatically discover this sensor:
# Home Assistant configuration.yaml
binary_sensor:
  - platform: mqtt
    name: "Office Human Presence"
    state_topic: "home/sensor/presence/office"
    payload_on: "ONLINE"
    payload_off: "OFFLINE"
    device_class: occupancy
    qos: 1
Once set up, your Home Assistant will have a new “Office Human Presence” sensor — much more sensitive than PIR, and won’t keep deciding “no one’s here.”
Advanced: Adjusting Detection Range
The RCWL-0516’s default detection range is about 5-7 meters. If you want to use it in smaller spaces (like a bathroom or closet), you can adjust the detection range.
Method 1: Add a Shield
The simplest and most brute-force approach — make a cover from metal foil (aluminum foil) to cover the sensor’s antenna side, leaving only one direction open. This can significantly reduce the detection range.
Method 2: Modify the Capacitor
The C-TM capacitor on the module determines detection sensitivity. The original is typically 1nF:
- Reduce capacitance → Lower sensitivity → Shorter detection range
- Increase capacitance → Higher sensitivity → Longer detection range
Reference values:
| C-TM Capacitor | Approximate Detection Range |
|---|---|
| 0.5nF | ~2-3 meters |
| 1nF (default) | ~5-7 meters |
| 2nF | ~8-10 meters |
Method 3: Add a Potentiometer to VIN
Lowering the supply voltage reduces transmission power, thereby shortening detection range. Add an adjustable potentiometer in the VIN circuit to fine-tune from 4V to 9V.
CDS Pin: Automatic Daytime Disable
The RCWL-0516’s CDS pin is for connecting a photoresistor. When ambient light is bright enough, the sensor automatically stops outputting HIGH, avoiding wasted resources during the day.
Wiring:
CDS pin ──▶ Photoresistor ──▶ 5V
                  │
                10kΩ resistor
                  │
                GND
When it’s dark, the photoresistor’s resistance increases → CDS pin voltage is low → sensor works normally When it’s bright, the photoresistor’s resistance decreases → CDS pin voltage is high → sensor is disabled
If you don’t need this feature, just leave the CDS pin floating (it defaults to working normally).
Common Troubleshooting
Q1: Sensor always outputs HIGH, never goes LOW?
Possible causes:
- Continuous motion objects in detection range: Fan rotation, curtain movement, pet movement will all trigger it. Check the surrounding environment, or shorten the detection range.
- Sensor malfunction: Measure the OUT pin voltage with a multimeter. Normally with no one present, it should be close to 0V.
- Insufficient power: VIN voltage below 4V may cause abnormal operation. Ensure power is within the 4-28V range.
Q2: Sensor sensitivity too low, can’t detect people?
- Check power supply: Sensitivity is lower at 3.3V, try 5V
- Check installation direction: Radar waves mainly emit from the front of the module (component side), sensitivity is very low on the back
- Increase C-TM capacitance (see “Adjusting Detection Range” section above)
Q3: Output signal jitters frequently, state keeps switching?
This is a known characteristic of the RCWL-0516. The solution is the time window filtering from Practice 2 above. Adjust the ON_DELAY and OFF_DELAY values based on your actual environment.
Q4: Can it detect people in the next room through walls?
Theoretically yes, but actual results depend on:
- Wall material (drywall/wood is easy to penetrate, reinforced concrete almost impossible)
- Distance (effective range greatly reduced after penetrating walls)
- Interference (if there are fans, air conditioners, etc. next door, they’ll also be detected)
If your scenario is “detecting whether someone is in the next room,” I recommend using WiFi probes or Bluetooth beacon solutions instead for better reliability.
Q5: RCWL-0516 vs LD2410, which to choose?
If you’re starting a new project, I strongly recommend looking at the LD2410 (24GHz millimeter wave radar). Comparison:
| Feature | RCWL-0516 | LD2410 (24GHz) |
|---|---|---|
| Frequency | 3.15 GHz | 24 GHz |
| Detection Accuracy | Can only determine presence/absence | Can distinguish presence/absence + distance info |
| Micro-motion Detection | Average | Excellent (can detect breathing, heartbeat) |
| Price | ~¥5 | ~¥20 |
| Interface | Digital OUT | UART serial |
| Recommended Scenarios | Simple presence detection | Precise human presence detection |
The LD2410 is a newer-generation solution, suitable for scenarios requiring higher precision. But the RCWL-0516 wins on price and simplicity — it’s more than enough for learning and entry-level projects.
Summary
The RCWL-0516 millimeter wave radar sensor is one of the best choices for getting started with human presence detection:
- Pros: Cheap, simple wiring, can penetrate obstacles, unaffected by temperature, can detect micro-movements
- Cons: Signal can jitter, cannot provide distance information, cannot distinguish humans from pets
With the three practice projects in this article, you can now build:
- Basic human detection (local indication)
- Stable detection with anti-false-trigger filtering
- Smart home integration with MQTT reporting
Next, you could deploy multiple sensors in different rooms and use Home Assistant for whole-house human presence monitoring; or combine with light sensors to implement “turn on lights only when someone is present AND it’s dark” smart lighting logic.
Got questions or want to share your project? Feel free to discuss in the comments!