 物联网
物联网 LoRa Agricultural Monitoring System: Building a Kilometer-Range Sensor Network with ESP32 + SX1278
In modern agriculture, precision irrigation and environmental monitoring have become essential tools for boosting yields and conserving resources. Traditional WiFi solutions consume too much power and offer limited range; Bluetooth communication distances are far too short; and while 4G/NB-IoT provides wide coverage, it requires SIM cards and ongoing data plans.
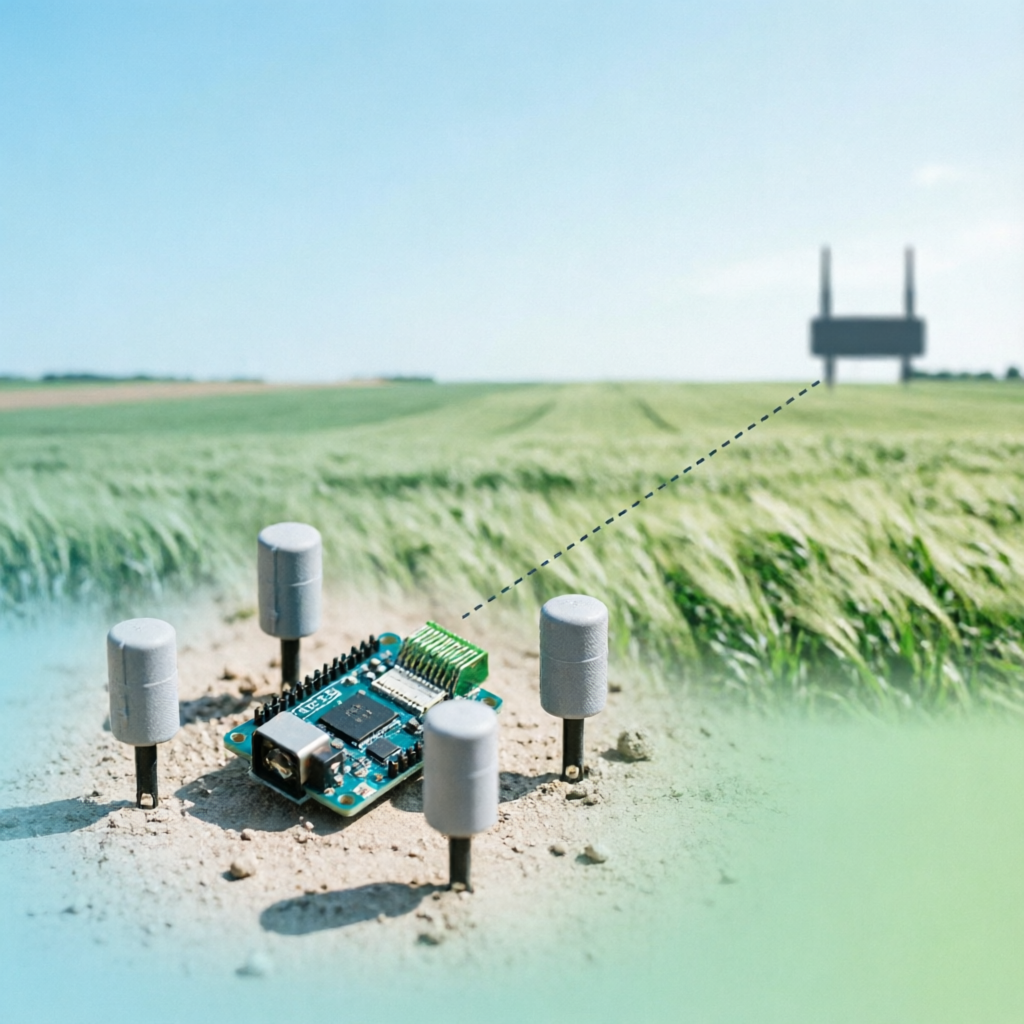
LoRa (Long Range) technology fills exactly this gap: ultra-low power consumption, kilometer-scale communication range, and no base stations or data fees. For farms, orchards, and greenhouses, LoRa is the ideal choice for building sensor networks.
This article walks you through building a complete agricultural monitoring system from scratch using ESP32 + SX1278 LoRa modules, covering:
- LoRa technology principles and key parameter analysis
- Hardware selection and circuit wiring
- Star topology networking (gateway + multiple nodes)
- Soil moisture, temperature, and light data acquisition code
- Low-power optimization techniques (months of battery life)
- Real-world deployment and debugging tips
Why Choose LoRa for Agricultural Monitoring?
Pain Points of Traditional Solutions
| Solution | Range | Power | Cost | Best For |
|---|---|---|---|---|
| WiFi | <100m | High | Low | Indoor, powered outlets |
| Bluetooth BLE | <50m | Medium | Low | Short-range pairing |
| Zigbee | <200m | Medium | Medium | Smart home mesh |
| 4G Cat.1 | Full coverage | High | High (SIM + data) | Remote single points |
| NB-IoT | Full coverage | Low | Medium (SIM + data) | Low-frequency reporting |
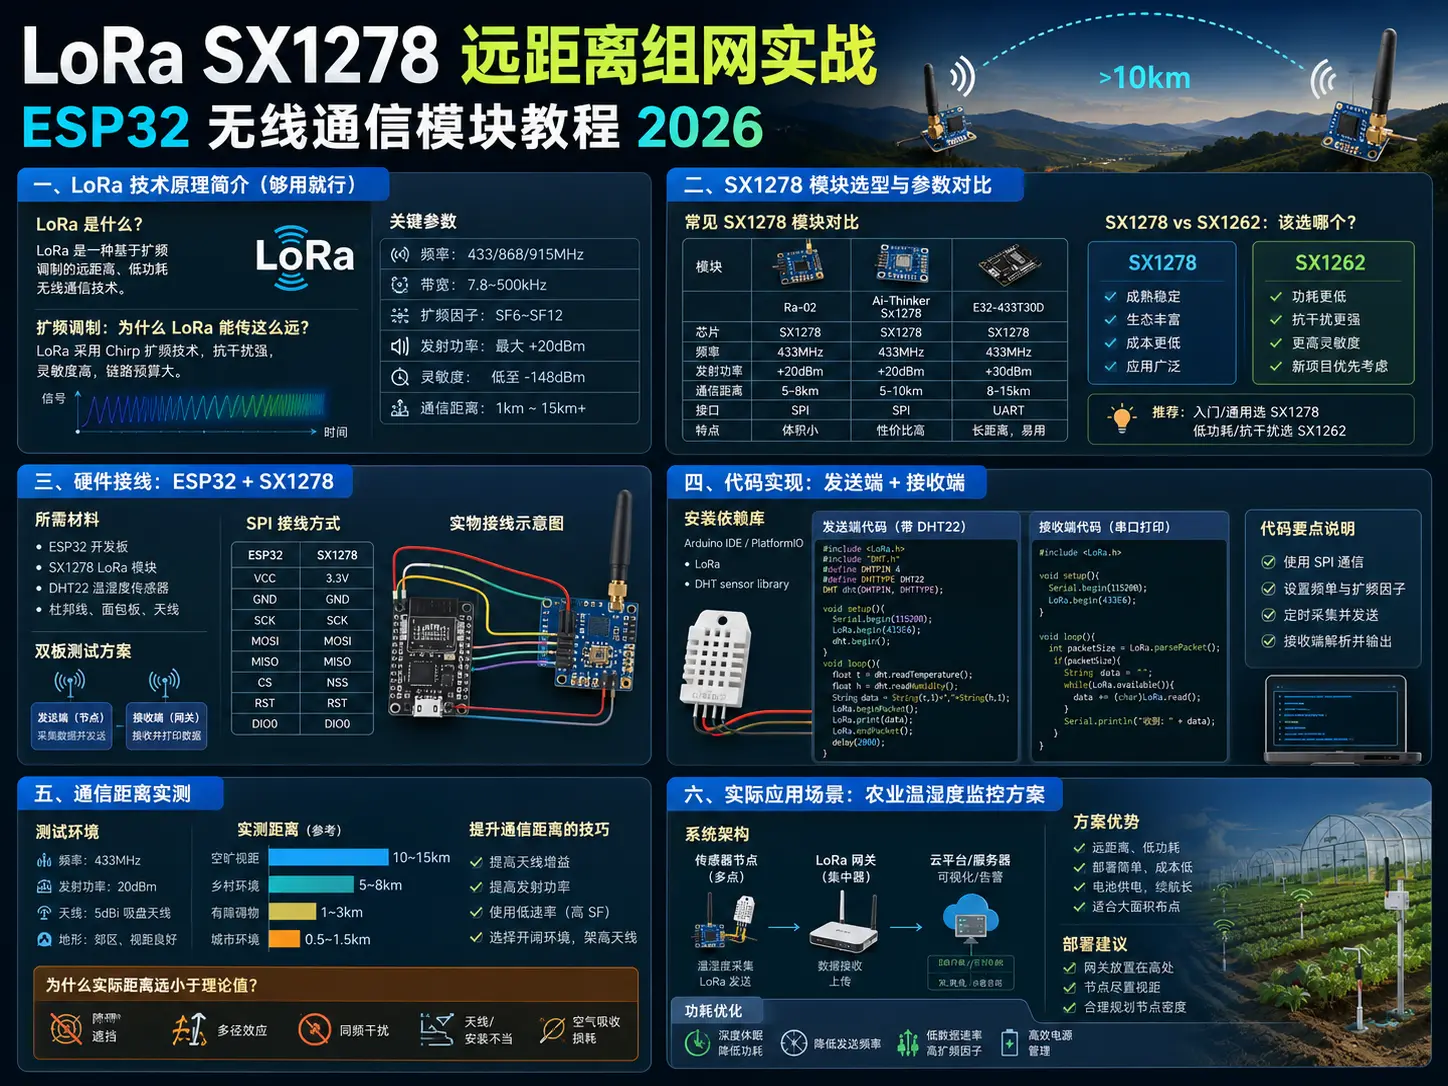
| LoRa | 3–15km | Ultra-low | Low | Large-area sensor networks |
Core Advantages of LoRa
- Ultra-long range: Up to 10–15 km in open suburban environments; typical 3–5 km coverage in urban/farmland settings
- Ultra-low power: Sleep current <5μA; a single data transmission takes only tens of milliseconds; AA batteries last for months
- License-free bands: Operates on 433 MHz (China), 868 MHz (Europe), 915 MHz (US) ISM bands — no license required
- Strong penetration: Low-frequency signals penetrate vegetation, soil, and building structures better than 2.4 GHz WiFi
- Self-built network: No carrier base stations needed — deploy your own gateway to cover the entire farm
Use Cases
- 🌾 Open-field agriculture: Soil moisture monitoring, weather station data collection
- 🍇 Orchards/vineyards: Distributed temperature and humidity sensor networks
- 🏡 Greenhouses: Centralized environmental parameter monitoring across multiple bays
- 🐄 Livestock farming: Animal tracking, geofencing, and fence monitoring
- 💧 Irrigation systems: Remote valve control, water usage metering
LoRa Technology: Key Parameters Explained
Spread Spectrum Modulation
LoRa is based on CSS (Chirp Spread Spectrum) technology, which encodes data as “chirp” signals whose frequency changes over time. Compared to traditional FSK modulation, LoRa achieves higher receiver sensitivity at the same transmit power.
Key parameter: Spreading Factor (SF)
| SF Value | Chirps per Bit | Data Rate | Receiver Sensitivity | Interference Resistance |
|---|---|---|---|---|
| SF7 | 128 | Fast | -123 dBm | Medium |
| SF9 | 512 | Medium | -130 dBm | High |
| SF12 | 4096 | Slow | -137 dBm | Very High |
Rule of thumb: Each SF increment doubles the transmission time but improves receiver sensitivity by roughly 2.5 dB. Agricultural monitoring typically uses SF9–SF10 to balance range and power consumption.
Bandwidth
The SX1278 supports bandwidths from 7.8 kHz to 500 kHz. Common configurations:
- 125 kHz: Standard setting, compatible with most LoRaWAN networks
- 250 kHz: Doubles the data rate, suitable for high-frequency data collection
- 500 kHz: Highest data rate, but receiver sensitivity drops by 6 dB
In agricultural scenarios, sensor data changes slowly (hourly sampling is usually sufficient), so 125 kHz is the optimal choice.
Coding Rate
LoRa uses forward error correction (FEC). The coding rate (CR) indicates the redundancy level:
- CR 4/5: 20% redundancy, fastest throughput
- CR 4/8: 50% redundancy, most reliable
The default CR 4/5 works well in most cases. In electromagnetically noisy farm environments, consider increasing to CR 4/6.
Estimating Real-World Communication Range
Theoretical link budget = Transmit power − Receiver sensitivity
Using the SX1278 as an example:
- Transmit power: +20 dBm (100 mW, the maximum allowed under Chinese regulations)
- SF10 receiver sensitivity: -132 dBm
- Link budget: 20 − (−132) = 152 dB
According to the free-space path loss formula, a 152 dB link budget at 433 MHz corresponds to roughly 8–10 km theoretical range. In practice, terrain, vegetation, and buildings reduce typical coverage to 3–5 km.
Hardware Selection and Circuit Wiring
Core Component List
| Component | Recommended Model | Unit Price (approx.) | Notes |
|---|---|---|---|
| Main MCU | ESP32-WROOM-32 | ¥15 | Dual-core 240 MHz, built-in WiFi/BLE |
| LoRa Module | SX1278 433 MHz | ¥12 | Original Semtech chip, +20 dBm |
| Soil Moisture Sensor | Capacitive v1.2 | ¥8 | Capacitive type, corrosion-resistant |
| Temp/Humidity Sensor | SHT30 | ¥15 | I2C interface, ±2% RH accuracy |
| Light Sensor | BH1750 | ¥6 | I2C interface, 1–65535 lux |
| Antenna | 433 MHz Spring Antenna | ¥3 | 2 dBi gain |
| Power Supply | 18650 Battery + TP4056 | ¥20 | 3.7 V Li-ion with charge protection |
| PCB/Perfboard | — | ¥5 | Node assembly base |
Total cost: Approximately ¥80–90 per node; the gateway (just ESP32 + SX1278 + power supply) costs about ¥35.
SX1278 to ESP32 Wiring
The SX1278 module communicates with the ESP32 via the SPI bus:
SX1278        ESP32
────────      ─────
VCC       →   3.3V
GND       →   GND
SCK       →   GPIO 18 (VSPI SCK)
MISO      →   GPIO 19 (VSPI MISO)
MOSI      →   GPIO 23 (VSPI MOSI)
NSS/CS    →   GPIO 5  (VSPI SS)
RESET     →   GPIO 14
DIO0      →   GPIO 2  (Interrupt pin, receive-done signal)
⚠️ Note: The SX1278 operates at 1.8–3.6 V — connect to 3.3 V only. Do NOT connect to 5 V!
Sensor Wiring
SHT30 (I2C):
  VCC → 3.3V
  GND → GND
  SDA → GPIO 21
  SCL → GPIO 22

BH1750 (I2C):
  VCC → 3.3V
  GND → GND
  SDA → GPIO 21 (shared with SHT30)
  SCL → GPIO 22 (shared with SHT30)

Capacitive Soil Moisture Sensor:
  VCC → 3.3V
  GND → GND
  AOUT → GPIO 34 (ADC1_CH6)
I2C devices can share the same bus — each device has a unique address (SHT30: 0x44, BH1750: 0x23).
Antenna Selection
- Spring antenna: Low cost, omnidirectional radiation, suitable for fixed installations
- Rubber duck antenna: Higher gain (5 dBi), more directional
- PCB antenna: Integrated on the module, compact but shorter range
For agricultural use, external spring or rubber duck antennas are recommended, mounted as high as possible (1–2 meters) to avoid obstruction by crops.
Star Topology Network Design
The agricultural monitoring network uses a star topology: one gateway at the center, with multiple nodes distributed around it.
                    ┌──────────┐
                    │  Gateway  │ ← ESP32 + SX1278 + WiFi/4G
                    │  (Center) │    Data uploaded to cloud server
                    └─────┬─────┘
                          │ LoRa 433 MHz
          ┌───────────────┼───────────────┐
          │               │               │
     ┌────┴────┐    ┌────┴────┐    ┌────┴────┐
     │ Node 1  │    │ Node 2  │    │ Node 3  │
     │Soil Mo. │    │Temp/Hum │    │Light    │
     └─────────┘    └─────────┘    └─────────┘
Why Not Mesh?
LoRa mesh networks (e.g., LoRaMesh, RadioHead Mesh) have several drawbacks:
- Routing overhead increases power consumption
- Network stability depends on intermediate nodes
- Complex debugging and difficult fault isolation
For agricultural monitoring — a low-frequency, primarily unidirectional use case — a star topology is simpler and more reliable. If a node is too far from the gateway, you can add a relay node (forwarding only, no data collection).
Node Address Assignment
Each node uses a unique Node ID (1–255), hardcoded in firmware or set via DIP switches. The gateway identifies the source of each packet by its Node ID.
// Defined in node firmware
#define NODE_ID 1  // Change this value for each node
Node Code Example
Development uses the Arduino IDE with the LoRa library by Sandeep Mistry (GitHub: sandeepmistry/arduino-LoRa).
Installing Dependencies
Search for and install these in the Arduino IDE Library Manager:
LoRaby Sandeep MistryAdafruit SHT31 LibraryBH1750by Christopher Laws
Complete Node Code
#include <SPI.h>
#include <LoRa.h>
#include <Wire.h>
#include <Adafruit_SHT31.h>
#include <BH1750.h>

// ========== Configuration ==========
#define NODE_ID       1          // Node ID, different for each node
#define LORA_FREQ     433E6      // Frequency 433 MHz
#define LORA_SF       10         // Spreading Factor SF10
#define LORA_BW       125E3      // Bandwidth 125 kHz
#define LORA_CR       5          // Coding Rate 4/5
#define TX_INTERVAL   300000     // Transmission interval 5 min (ms)

// SPI pin definitions (ESP32 VSPI)
#define LORA_SS       5
#define LORA_RST      14
#define LORA_DIO0     2

// Sensor objects
Adafruit_SHT31 sht31;
BH1750 lightMeter;

// ADC pin
#define SOIL_PIN      34

void setup() {
  Serial.begin(115200);
  Serial.println("LoRa Agriculture Node Starting...");

  // Initialize sensors
  Wire.begin(21, 22);  // SDA, SCL

  if (!sht31.begin(0x44)) {
    Serial.println("SHT31 not found!");
  }

  if (!lightMeter.begin(BH1750::CONTINUOUS_HIGH_RES_MODE)) {
    Serial.println("BH1750 not found!");
  }

  // Initialize LoRa
  LoRa.setPins(LORA_SS, LORA_RST, LORA_DIO0);
  if (!LoRa.begin(LORA_FREQ)) {
    Serial.println("LoRa init failed!");
    while (1);
  }

  LoRa.setSpreadingFactor(LORA_SF);
  LoRa.setSignalBandwidth(LORA_BW);
  LoRa.setCodingRate4(LORA_CR);
  LoRa.setTxPower(20);  // Maximum power 20 dBm

  Serial.println("LoRa initialized successfully");
}

void loop() {
  // Read sensor data
  float temperature = sht31.readTemperature();
  float humidity = sht31.readHumidity();
  uint16_t light = lightMeter.readLightLevel();
  int soilMoisture = analogRead(SOIL_PIN);  // 0–4095

  // Build packet: [NODE_ID][temp][humidity][light][soil]
  // Binary format minimizes transmission time
  uint8_t packet[11];
  packet[0] = NODE_ID;

  // Temperature: int16_t, unit 0.01°C
  int16_t tempInt = (int16_t)(temperature * 100);
  memcpy(&packet[1], &tempInt, 2);

  // Humidity: uint16_t, unit 0.01%
  uint16_t humInt = (uint16_t)(humidity * 100);
  memcpy(&packet[3], &humInt, 2);

  // Light: uint16_t, unit lux
  memcpy(&packet[5], &light, 2);

  // Soil moisture: uint16_t, raw ADC value
  uint16_t soilInt = (uint16_t)soilMoisture;
  memcpy(&packet[7], &soilInt, 2);

  // CRC check (simple XOR)
  uint8_t crc = 0;
  for (int i = 0; i < 9; i++) {
    crc ^= packet[i];
  }
  packet[9] = crc;
  packet[10] = 0xAA;  // End marker

  // Send data
  LoRa.beginPacket();
  LoRa.write(packet, 11);
  int status = LoRa.endPacket();

  if (status) {
    Serial.printf("Node %d: T=%.1f H=%.1f L=%d S=%d [OK]\n",
                  NODE_ID, temperature, humidity, light, soilMoisture);
  } else {
    Serial.println("Transmission failed!");
  }

  // Enter deep sleep
  Serial.println("Entering deep sleep...");
  esp_deep_sleep(TX_INTERVAL * 1000);  // microseconds
}
Code Highlights
- Binary packing: Compared to JSON text, the binary format compresses the packet from ~50 bytes to 11 bytes, reducing transmission time by 70%
- CRC verification: A simple XOR checksum detects transmission errors; the gateway validates it upon receipt
- Deep sleep:
esp_deep_sleep()shuts down the CPU and most peripherals, dropping current to ~10μA - Fixed interval: Wakes every 5 minutes, collects and transmits data, then returns to sleep
Gateway Code Example
The gateway receives data from all nodes and uploads it to a server via WiFi.
#include <SPI.h>
#include <LoRa.h>
#include <WiFi.h>
#include <HTTPClient.h>

// ========== WiFi Configuration ==========
const char* ssid = "YourWiFiSSID";
const char* password = "YourWiFiPassword";

// ========== Server Configuration ==========
const char* serverUrl = "http://your-server.com/api/lora-data";

// LoRa pins (same as node)
#define LORA_SS   5
#define LORA_RST  14
#define LORA_DIO0 2

void setup() {
  Serial.begin(115200);

  // Connect to WiFi
  WiFi.begin(ssid, password);
  while (WiFi.status() != WL_CONNECTED) {
    delay(500);
    Serial.print(".");
  }
  Serial.println("\nWiFi connected");

  // Initialize LoRa (parameters must match nodes)
  LoRa.setPins(LORA_SS, LORA_RST, LORA_DIO0);
  if (!LoRa.begin(433E6)) {
    Serial.println("LoRa init failed!");
    while (1);
  }
  LoRa.setSpreadingFactor(10);
  LoRa.setSignalBandwidth(125E3);
  LoRa.setCodingRate4(5);

  Serial.println("Gateway ready, waiting for packets...");
}

void loop() {
  // Try to receive a packet
  int packetSize = LoRa.parsePacket();
  if (packetSize == 11) {  // Expected length
    uint8_t packet[11];
    LoRa.readBytes(packet, 11);

    // Verify end marker
    if (packet[10] != 0xAA) {
      Serial.println("Invalid packet end");
      return;
    }

    // Verify CRC
    uint8_t crc = 0;
    for (int i = 0; i < 9; i++) {
      crc ^= packet[i];
    }
    if (crc != packet[9]) {
      Serial.println("CRC check failed");
      return;
    }

    // Parse data
    uint8_t nodeId = packet[0];

    int16_t tempInt;
    memcpy(&tempInt, &packet[1], 2);
    float temperature = tempInt / 100.0;

    uint16_t humInt;
    memcpy(&humInt, &packet[3], 2);
    float humidity = humInt / 100.0;

    uint16_t light;
    memcpy(&light, &packet[5], 2);

    uint16_t soil;
    memcpy(&soil, &packet[7], 2);

    // Print log
    Serial.printf("Received from Node %d: T=%.1f H=%.1f L=%d S=%d RSSI=%d\n",
                  nodeId, temperature, humidity, light, soil, LoRa.packetRssi());

    // Upload to server
    uploadToServer(nodeId, temperature, humidity, light, soil);
  }
}

void uploadToServer(uint8_t nodeId, float temp, float hum,
                    uint16_t light, uint16_t soil) {
  if (WiFi.status() != WL_CONNECTED) {
    return;
  }

  HTTPClient http;
  http.begin(serverUrl);
  http.addHeader("Content-Type", "application/json");

  // Build JSON payload
  String json = "{";
  json += "\"node_id\":" + String(nodeId) + ",";
  json += "\"temperature\":" + String(temp, 2) + ",";
  json += "\"humidity\":" + String(hum, 2) + ",";
  json += "\"light\":" + String(light) + ",";
  json += "\"soil_moisture\":" + String(soil);
  json += "}";

  int httpResponseCode = http.POST(json);
  if (httpResponseCode > 0) {
    Serial.printf("Upload OK: %d\n", httpResponseCode);
  } else {
    Serial.printf("Upload failed: %d\n", httpResponseCode);
  }
  http.end();
}
Gateway Design Notes
- Continuous listening: The gateway does not sleep — it continuously calls
LoRa.parsePacket()to check for incoming data - RSSI logging:
LoRa.packetRssi()returns signal strength, useful for estimating node distance and antenna orientation - WiFi reconnection: If WiFi drops, the gateway should automatically reconnect to prevent data loss
- Data buffering: If the server is temporarily unavailable, data can be stored on SPIFFS/SD card and uploaded later
Low-Power Optimization Techniques
Agricultural sensor nodes are typically deployed in the field on battery power. Here are field-tested low-power optimization methods:
1. Deep Sleep Strategy
ESP32 deep sleep draws approximately 10–15μA — about 1/5000th of normal operation (~80 mA).
// Calculate sleep duration
#define INTERVAL_HOURS  1      // Sample once per hour
esp_deep_sleep(INTERVAL_HOURS * 3600 * 1000000);  // microseconds
Battery life estimate (2000 mAh 18650 cell):
- Active time: ~2 seconds per wake cycle (sampling + transmission)
- Sleep time: 3598 seconds
- Average current ≈ (80 mA × 2s + 10μA × 3598s) / 3600s ≈ 0.05 mA
- Theoretical runtime: 2000 mAh / 0.05 mA ≈ 40,000 hours ≈ 4.5 years
In practice, self-discharge and temperature effects bring typical battery life to 6–12 months.
2. Disable Unused Peripherals
// Disconnect WiFi/BLE before sleep (if not in use)
WiFi.disconnect(true);
btStop();

// Cut power to I2C peripherals (using MOSFET control)
digitalWrite(SENSOR_POWER_PIN, LOW);  // Power off
delay(100);
3. Adaptive Transmission Interval
Dynamically adjust the sampling frequency based on data change rate:
// If soil moisture change < 5%, extend to 2-hour interval
if (abs(currentSoil - lastSoil) < 200) {
  esp_deep_sleep(2 * 3600 * 1000000);
} else {
  esp_deep_sleep(30 * 60 * 1000000);  // Shorten to 30 min when变化 is large
}
4. Solar Recharging
For long-term deployments, add a small solar panel (5 V, 1 W) + TP4056 charge module for perpetual operation. Make sure to use a charge board with overcharge protection.
Real-World Deployment and Debugging Tips
Common Problems and Solutions
Problem 1: Gateway Cannot Receive Node Data
Troubleshooting steps:
- Verify that LoRa parameters match exactly (frequency, SF, BW, CR)
- Check the node’s
LoRa.endPacket()return value via serial monitor - Inspect the antenna feed line for open or short circuits
- Bring the node close to the gateway (<10 m) to test basic communication
Common mistake:
// ❌ Wrong: Gateway and node SF mismatch
// Node:  LoRa.setSpreadingFactor(10);
// Gateway: LoRa.setSpreadingFactor(7);  // Doesn't match!

// ✅ Correct: Both must be identical
Problem 2: Packet CRC Check Fails
Possible causes:
- Electromagnetic interference (nearby motors, variable-frequency drives)
- Poor antenna connection
- Excessive distance, signal near receiver sensitivity limit
Solutions:
- Increase coding rate:
LoRa.setCodingRate4(6)or(7) - Increase SF: from SF10 to SF11 or SF12
- Check antenna connections; ensure SMA connectors are tightened
Problem 3: Battery Drains Too Fast
Checklist:
- Confirm the node enters
esp_deep_sleep(), notdelay() - Check for peripherals drawing current continuously (LEDs, powered sensors)
- Measure sleep current: disconnect battery, insert multimeter in series — should be <20μA
- Verify the SX1278 enters sleep mode after transmission
Measurement setup:
Battery (+) → Multimeter (current mode) → ESP32 VCC
Normal sleep current: 10–15μA
Abnormally high: >100μA — investigate leakage
Problem 4: Unstable Soil Moisture Readings
Capacitive sensors are affected by:
- Soil compaction (contact resistance variation)
- Fertilizer/salt concentration (conductivity changes)
- Sensor surface oxidation
Calibration method:
// Reading in air (dry)
int dryValue = analogRead(SOIL_PIN);  // approximately 3000–3500

// Reading in water (saturated)
int wetValue = analogRead(SOIL_PIN);  // approximately 1000–1500

// Linear mapping to 0–100%
int moisturePercent = map(soilValue, wetValue, dryValue, 100, 0);
moisturePercent = constrain(moisturePercent, 0, 100);
Recalibrate every 3–6 months.
Field Deployment Recommendations
- Antenna height: Mount the gateway antenna at 2–3 meters; node antennas at least 0.5 m above ground to avoid crop obstruction
- Waterproofing: Use enclosures rated IP65 or above for all nodes; seal connections with heat-shrink tubing
- Lightning protection: In thunderstorm-prone areas, install gas discharge tubes or TVS diodes between the antenna and equipment
- Labeling: Mark each node enclosure with its Node ID and installation location for easy maintenance
- Test first: Before full deployment, conduct a link budget test in the target area to confirm the farthest node has RSSI > −120 dBm
Future Expansion Directions
Once the basic monitoring system is running, you can extend it with additional features:
1. Downlink Control
The current system is unidirectional (node → gateway). To remotely control irrigation valves, add a downlink channel:
// Gateway sends a control command
LoRa.beginPacket();
LoRa.write(0x01);       // Target Node ID
LoRa.write(0xA5);       // Command: open valve
LoRa.endPacket();

// Node listens for downlink data
if (LoRa.parsePacket()) {
  uint8_t cmd = LoRa.read();
  if (cmd == 0xA5) {
    digitalWrite(RELAY_PIN, HIGH);  // Open solenoid valve
  }
}
Note: Nodes must periodically wake to listen for downlink data, which increases power consumption. A time-division multiplexing approach works well — nodes wake for a 5-second listening window at fixed intervals (e.g., on the hour).
2. LoRaWAN Integration
To connect to standard LoRaWAN networks (e.g., The Things Network), replace the SX1278 with a RAK4200 or use ESP32 + RFM95 + LMIC library and join via OTAA. Advantages: multi-gateway roaming, cloud management. Disadvantages: more complex configuration, dependence on public network infrastructure.
3. Data Visualization
Feed the gateway’s uploaded data into Grafana + InfluxDB to enable:
- Real-time temperature and humidity curves
- Soil moisture heat maps
- Anomaly alerts (email/SMS)
- Historical data export
4. Edge Computing
Add simple logic on the gateway:
- Soil moisture <30% AND no rain forecast in the next 2 hours → automatically start irrigation
- Temperature >35°C → deploy shade nets
- 3 consecutive communication failures → flag node as offline
Use the ESP32’s second core to run control logic without interfering with LoRa reception.
Summary
LoRa technology provides a low-cost, low-power, long-range solution for agricultural monitoring. With the ESP32 + SX1278 combination, you can build a sensor network covering several square kilometers at a per-node cost of under ¥100.
Key takeaways:
- Choose the right SF and bandwidth to balance range and power consumption
- Use binary packing and deep sleep to maximize battery life
- Star topology is simple, reliable, and well-suited for low-frequency reporting
- Pay attention to antenna height, waterproofing, and lightning protection during field deployment
We hope this article helps you quickly build your own LoRa agricultural monitoring system. If you have questions, feel free to leave a comment!
Code from this article has been uploaded to GitHub: [link to be added] Hardware procurement list: [Taobao/JD links to be added]