 AI开发工具
 The Complete Pi Coding Agent 2026 Guide: From Beginner to Expert
What Is Pi Coding Agent?
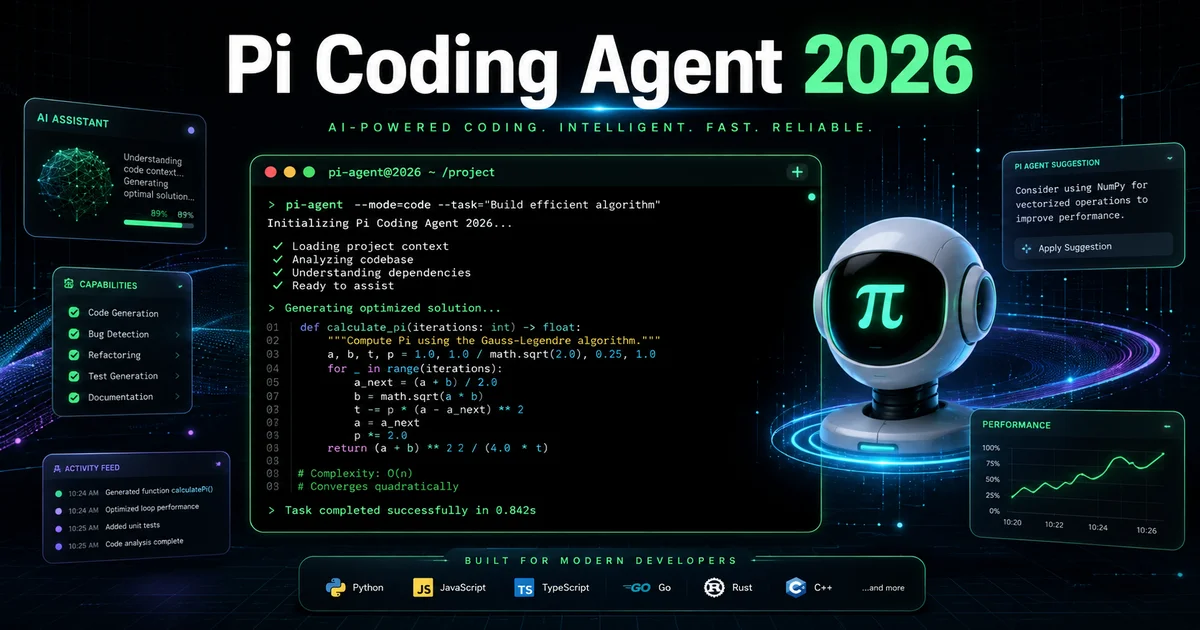
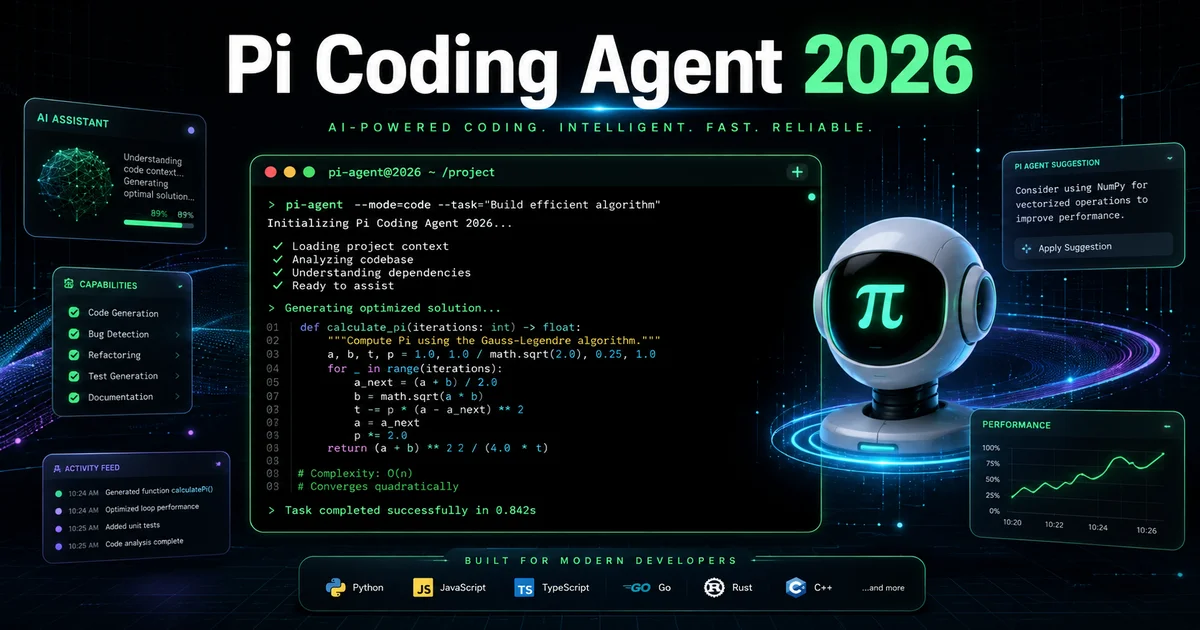
Pi Coding Agent is an open-source (MIT licensed) terminal-based AI coding assistant developed and maintained by Earendil Inc., founded by Mario Zechner (GitHub: badlogic). As of August 2026, Pi has accumulated over 91,600 stars on GitHub, with the latest version at v0.84.2, making it one of the fastest-growing AI coding tools available. It belongs to a new category called AI Coding Agent — unlike traditional “AI autocomplete” tools, an Agent can autonomously plan and execute complete development tasks. It is the most active segment in the current AI coding tool ecosystem and a core piece of infrastructure for the Vibe Coding movement.
Unlike IDE-based tools such as Cursor or Windsurf, Pi runs entirely in the terminal. It is not tied to any editor; instead, it operates directly on your file system and command line through 4 core tools (read, write, edit, bash). Think of it as an “AI programmer that lives in your terminal” — you describe your requirements in natural language, and it reads code, modifies files, and runs commands, all transparently and auditable.
Pi’s core design philosophy is minimal core + user-extensible. It provides only the 4 most essential tools, but through TypeScript-based extensions, skills, and packages, you can add virtually any capability. This architecture lets Pi satisfy beginners’ “out-of-the-box” needs while giving advanced users room for deep customization.
Core Advantages of Pi Agent
- Fully open source: MIT license, transparent code, community-driven
- Terminal-native: No IDE dependency — works over SSH, inside Docker containers, anywhere
- Model-agnostic: Supports 15+ model providers (Anthropic, OpenAI, Google, Mistral, local Ollama, etc.)
- Zero-cost entry: The tool itself is free; just bring your own API key or reuse an existing Claude/ChatGPT/Copilot subscription
- Highly extensible: TypeScript extension system with a rich community ecosystem
Installation and Configuration
System Requirements
- OS: macOS 12+, Ubuntu 22.04+, Windows 11 (WSL2 required)
- Node.js: 22.0 or later
- Network: Requires access to your chosen AI model’s API
Installation Methods
Method 1: One-liner install script (recommended)
curl -fsSL https://pi.dev/install.sh | bashThis script automatically detects your system architecture, downloads the appropriate binary, and adds it to your PATH. After installation, verify with:
pi --version
# Example output: pi 0.84.2
Method 2: Via npm
npm install -g @earendil-works/pi-coding-agentMethod 3: Build from source
git clone https://github.com/earendil-works/pi.git
cd pi
npm install
npm run build
npm link
Initial Configuration
After installation, run pi to launch the interactive setup wizard:
piThe wizard will guide you through:
- Choose a model provider: For first-time setup, Anthropic Claude or OpenAI is recommended
- Enter your API key: Paste your key directly (stored in
~/.pi/config.jsonwith 600 permissions) - Select a default model: e.g.
claude-sonnet-4-20250514,gpt-4o,gemini-2.5-pro - Configure working directory: Pi launches in your current directory
You can also manually edit the config file ~/.pi/config.json:
{
  "provider": "anthropic",
  "model": "claude-sonnet-4-20250514",
  "apiKey": "sk-ant-xxx",
  "theme": "dark",
  "autoApprove": false,
  "maxTokens": 8192
}
Multi-Model Configuration
Pi supports configuring multiple model providers simultaneously, with the ability to switch between them at runtime:
{
  "providers": {
    "anthropic": {
      "apiKey": "sk-ant-xxx",
      "defaultModel": "claude-sonnet-4-20250514"
    },
    "openai": {
      "apiKey": "sk-xxx",
      "defaultModel": "gpt-4o"
    },
    "ollama": {
      "baseUrl": "http://localhost:11434",
      "defaultModel": "qwen3-coder:30b"
    }
  }
}
In the interactive interface, type /model to switch the active model.
Core Features in Detail
1. Code Generation and Completion
Pi can do far more than complete single lines of code — it understands your entire project context and generates complete functional modules.
Example: Generate an Express.js REST API
> Create an Express.js project with user registration, login, and JWT authenticationPi will automatically:
- Initialize
package.jsonand install dependencies (express, jsonwebtoken, bcryptjs) - Create the project structure (
src/routes/,src/middleware/,src/models/) - Write complete route, middleware, and data validation code
- Generate
.env.exampleandREADME.md
Throughout the process, you’ll see Pi call the write tool to create each file, with all operations displayed in real time in the terminal.
2. File Operations
Of Pi’s 4 core tools, read and write handle file I/O, while edit handles precise modifications:
- read: Reads file contents, supports reading large files by line range
- write: Creates new files or completely overwrites existing ones
- edit: Diff-based precise editing — only modifies the parts that need changing
> Change the formatDate function in src/utils/date.ts to support multilingual formattingPi will first read the file to understand the current implementation, then use the edit tool to precisely modify the target function while leaving the rest of the file unchanged.
3. Terminal Command Execution
Through the bash tool, Pi can execute commands directly in your terminal:
> Run the tests, and if any fail, fix themPi will run npm test, parse the failure output, locate the problematic code, apply fixes, and re-run the tests — looping until everything passes.
Safety mechanism: By default, Pi asks for your confirmation before executing each command. You can set autoApprove: true to auto-approve, but this is recommended only in controlled environments (e.g., Docker containers).
4. Context Management
Pi’s context management is one of its core competitive strengths:
- Automatic indexing: Scans the project structure on startup and builds a file relationship graph
- Smart referencing: When you mention a function or module, Pi automatically locates and loads the relevant code
- Long-session support: Context window management and summarization mechanisms support hours of continuous conversation
- @ syntax referencing: Use
@src/auth/jwt.tsto explicitly add a file to the context
> Look at @src/services/payment.ts and @src/routes/checkout.ts,
> help me figure out why the order status isn't updating after a successful payment
How Pi Agent Works
Understanding Pi’s inner workings will help you use it more effectively.
The Core Loop: Think-Act-Observe
Pi operates on a classic Agent loop:
- Think: Receives user input, combines it with project context, and plans the next action
- Act: Calls tools (read/write/edit/bash) to perform concrete operations
- Observe: Reads tool output and determines whether the goal has been reached
- Loop: If the task isn’t complete, returns to step 1
This loop continues until Pi considers the task done or encounters an unsolvable problem. Throughout the process, you can see every thought and action logged in real time in the terminal — this is Pi’s transparency advantage over IDE-based tools.
Tool Calling Mechanism
Pi’s 4 core tools are defined with JSON Schema parameters, and the model calls them in a structured way:
User: "Help me fix this bug"
  ↓
Model thinks: Need to read the file first to understand the code
  ↓
Calls read tool → Returns file contents
  ↓
Model thinks: Found a logic error on line 42
  ↓
Calls edit tool → Precisely modifies line 42
  ↓
Calls bash tool → Runs tests to verify the fix
  ↓
Tests pass → Returns result to user
Every tool call is displayed in colored text in the terminal, and you can press Esc at any time to interrupt an ongoing operation.
Context Window Management
When conversations get long, Pi intelligently manages the limited context window:
- Recent conversation: Fully preserves the last 10-20 turns
- Earlier conversation: Automatically compressed into summaries, retaining key decisions and code changes
- File references: Files referenced via
@syntax always remain in context - Project structure: Maintains a compact representation of the project file tree
Pi Agent in IoT and Embedded Development
As a makeronsite.com reader, you’re likely more interested in Pi’s practical applications in IoT and embedded systems. Pi’s terminal-native nature makes it especially well-suited for these scenarios.
SSH Remote Development
IoT development frequently requires SSH-ing into a Raspberry Pi or remote server. Pi can run directly inside an SSH session:
ssh pi@192.168.1.100
pi
> Check the Python scripts in /home/pi/sensors/
> and figure out why the DHT22 sensor readings occasionally fail
Pi will read the code, analyze the timeout and retry logic, propose a fix, and apply it directly.
ESP32/Arduino Project Assistance
While Pi can’t flash firmware directly, it can help you:
- Write and optimize Arduino/ESP32 C++ code
- Configure PlatformIO projects (
platformio.ini) - Analyze serial logs and diagnose communication protocol issues
- Write Python host scripts to communicate with embedded devices
> Write an ESP32 MQTT client that
> connects to the EMQX public broker and publishes DHT22 temperature/humidity data every 30 seconds
Pi will generate complete Arduino code including WiFi connection, DHT22 reading, MQTT publishing, reconnection handling, and OTA update support.
Docker Containerized Deployment
IoT backend services typically require containerized deployment. Pi can help you:
> Create a docker-compose.yml that includes:
> - EMQX MQTT broker
> - Node-RED visual dashboard
> - InfluxDB time-series database
> - Grafana data dashboard
> Make sure they can communicate with each other
Pi will generate a complete docker-compose.yml with network configuration, volume mounts, environment variables, and correct service dependency ordering.
Real-World Examples
Example 1: Building a REST API
Build a complete Todo API from scratch:
> Create a Todo API using Fastify + Prisma + PostgreSQL
> with CRUD operations, pagination, and filtering
Pi’s execution process:
- Initializes the project and installs fastify, prisma, @prisma/client, and other dependencies
- Writes
prisma/schema.prismadefining the Todo model - Runs
npx prisma generateand database migrations - Creates the route file
src/routes/todos.tsimplementing 5 endpoints: list (with pagination/filtering), create, detail, update, delete - Writes
src/server.tsas the main entry point - Generates
docker-compose.ymlfor launching PostgreSQL - Creates
README.mdwith API documentation and usage instructions
Total code: ~200 lines, completed by Pi in under 3 minutes.
Example 2: Debugging Code Issues
> This function is extremely slow with more than 1000 records.
> Analyze why and optimize it

@src/services/report.ts
After reading the file, Pi discovers:
// Problem: O(n²) complexity
for (const item of items) {
  const related = items.filter(i => i.category === item.category);
  // ...
}
Pi explains the issue and proposes an optimization: replace the nested loop with Map-based grouping, reducing O(n²) to O(n). After the fix, processing 10,000 records drops from 12 seconds to 0.3 seconds.
Example 3: Refactoring Project Code
> Migrate all CommonJS require/module.exports in the project to ES ModulesPi will:
- Scan all
.jsand.tsfiles - Convert
require()toimportandmodule.exportstoexportfile by file - Update
package.jsonto add"type": "module" - Fix relative path issues caused by ESM async loading (
__dirname→import.meta.url) - Run tests to verify migration correctness
Example 4: Writing Tests
> Write unit tests for @src/services/auth.ts covering registration, login, token refresh, and expiration scenariosPi writes tests using Jest + TypeScript, including:
- Normal registration flow
- Duplicate email registration error
- Password hashing verification
- Successful login returning JWT
- Failed login with wrong password
- Token refresh mechanism
- Expired token rejection
Generates 12 test cases, all passing.
Advanced Techniques
Custom Extensions
Pi’s extension system is built on TypeScript, letting you add new tools to the Agent:
// extensions/docker.ts
import { defineExtension } from '@earendil-works/pi-coding-agent';

export default defineExtension({
  name: 'docker',
  tools: [
    {
      name: 'docker_exec',
      description: 'Execute a command in a specified container',
      parameters: {
        container: { type: 'string', description: 'Container name or ID' },
        command: { type: 'string', description: 'Command to execute' },
      },
      async execute({ container, command }) {
        const result = await exec(`docker exec ${container} ${command}`);
        return result.stdout;
      },
    },
  ],
});
Place the file in the ~/.pi/extensions/ directory, and Pi will load it automatically on startup.
Multi-Agent Parallel Execution
Pi supports running multiple Agent instances simultaneously for different tasks:
# Terminal 1: Frontend refactoring
pi --task "Refactor all class components in src/components/ to function components"

# Terminal 2: Backend API
pi --task "Add pagination and sorting to /api/v2/users"

# Terminal 3: Test coverage
pi --task "Add unit tests for all modules under src/services/"
Each Agent runs independently without interference. For large projects, this approach can significantly boost development efficiency.
IDE Integration
Although Pi is a terminal tool, it works seamlessly with any IDE:
- VS Code: Run Pi directly in VS Code’s integrated terminal
- JetBrains: Also supported via the integrated terminal
- Neovim: Integrate through toggleterm or floaterm plugins
- SSH remote development: Pi natively supports SSH environments with no extra configuration
Skills System
Skills are predefined prompt templates for common task types:
# Use built-in skills
pi --skill code-review "Check the src/auth/ directory for security issues"
pi --skill refactor "Convert callback-style code in src/utils/ to async/await"
You can also create custom skills, saved in the ~/.pi/skills/ directory.
10 Tips for Using Pi Effectively
1. Use CLAUDE.md / PI.md to Define Project Rules
Create a PI.md file in your project root — Pi reads it automatically on startup:
# PI.md

## Project Rules
- Use TypeScript strict mode
- All APIs return a unified format { code, data, message }
- Test coverage must be at least 80%
- Use Conventional Commits format for commit messages

## Tech Stack
- Backend: Fastify + Prisma + PostgreSQL
- Frontend: React + Vite + Tailwind CSS
- Deployment: Docker + Kubernetes
This way, Pi follows these rules in every conversation without needing repeated instructions.
2. Make Good Use of the /compact Command
After a long conversation, type /compact to compress the current context and free up window space. Pi retains key information while discarding redundant details.
3. Use —print Mode for Automation
Pi’s --print mode lets it run in CI/CD pipelines:
# Auto-generate changelog in GitHub Actions
pi --print "Generate CHANGELOG.md based on recent git commits" >> CHANGELOG.md

# Automated code review
pi --print "Review recent changes in src/api/ and point out potential security issues"
4. Restrict Tool Scope with —allowedTools
If you only want Pi to read files without modifying them, you can limit available tools:
pi --allowedTools "read,bash(git *)"Now Pi can only read files and execute git commands — it cannot modify any code. Perfect for code review scenarios.
5. Extend Capabilities with MCP
Pi supports the Model Context Protocol (MCP) for connecting to external services:
{
  "mcpServers": {
    "github": {
      "command": "npx",
      "args": ["-y", "@modelcontextprotocol/server-github"],
      "env": { "GITHUB_TOKEN": "ghp_xxx" }
    },
    "postgres": {
      "command": "npx",
      "args": ["-y", "@modelcontextprotocol/server-postgres"],
      "env": { "DATABASE_URL": "postgresql://..." }
    }
  }
}
Once configured, Pi can query databases and manage GitHub Issues directly — no need to leave the terminal.
6. Break Complex Tasks into Steps
Rather than describing the entire requirement at once, guide Pi step by step:
Step 1: "First, design the database model — don't write code yet"
Step 2: "The model looks good, now write the Prisma schema"
Step 3: "Generate a seed script to populate test data"
Step 4: "Write the API routes following RESTful conventions"
Step-by-step execution keeps each phase controllable and avoids Pi generating a massive amount of code that’s hard to debug.
7. Use —resume to Restore Sessions
Pi automatically saves conversation history. Use --resume to pick up where you left off:
pi --resume          # Resume the most recent session
pi --resume --id abc # Resume a specific session
8. Configure .piignore to Exclude Irrelevant Files
Similar to .gitignore, create a .piignore to exclude files you don’t want Pi to index:
node_modules/
dist/
*.min.js
coverage/
*.log
This significantly improves Pi’s context utilization efficiency.
9. Monitor API Consumption with /cost
Type /cost to see the current session’s token usage and expenses. For pay-as-you-go APIs, this feature helps you control costs.
10. Combine bash and Pi
One of Pi’s most powerful usage patterns is piping bash command output as input:
# Have Pi analyze a git diff
git diff HEAD~5 | pi --print "Review these code changes and point out potential issues"

# Have Pi analyze error logs
docker logs myapp --tail 100 | pi --print "Analyze these error logs and find the root cause"
Pi Agent vs Claude Code vs Cursor Comparison
| Feature | Pi Coding Agent | Claude Code | Cursor |
|---|---|---|---|
| Type | Terminal Agent | Terminal Agent | AI IDE (VS Code Fork) |
| Open Source | ✅ MIT License | ❌ Proprietary | ❌ Proprietary |
| Price | Free (bring your own API key) | $20/mo (Max plan includes quota) | $20/mo (Pro plan) |
| Model Support | 15+ providers | Anthropic Claude only | Multi-model (Claude/GPT/custom) |
| Local Models | ✅ Ollama/LM Studio | ❌ | ❌ |
| Runtime | Any terminal | Any terminal | Cursor IDE only |
| SSH Remote | ✅ Native support | ✅ Native support | ⚠️ Requires Remote SSH plugin |
| Extension System | ✅ TypeScript extensions | ⚠️ Limited | ✅ VS Code plugin ecosystem |
| Context Window | 200K tokens | 200K tokens | Depends on model |
| GitHub Stars | 91.6K+ | N/A (proprietary) | N/A (proprietary) |
| Best For | Full-stack dev, DevOps, remote servers | Pure coding tasks | Frontend/full-stack, visual development |
Recommendations:
- Choose Pi Agent if you need open source, model flexibility, terminal-native operation, or want to use it in SSH/Docker environments
- Choose Claude Code if you’re already a heavy Claude user and want the simplest possible setup
- Choose Cursor if you prefer a graphical IDE experience and don’t want to leave your editor
Ecosystem and Community
GitHub Project Overview
Pi’s GitHub repository (earendil-works/pi) is one of the fastest-growing open-source AI coding projects:
- Stars: 91,600+, grew over 5x during 2026
- Contributors: 200+ active contributors
- Release frequency: 2-3 releases per week
- License: MIT, no commercial restrictions
Community Ecosystem
A rich ecosystem has formed around Pi:
- Official docs: docs.pi.dev provides complete documentation
- Discord community: 10,000+ members, official developers available for Q&A
- Extension marketplace: Community has contributed 500+ extensions covering databases, cloud services, IoT, and more
- Template library: Official collection of 20+ project templates (React, Vue, FastAPI, ESP-IDF, etc.)
Version Evolution Timeline
2025 Q3  v0.1.x  Project released — core 4 tools + Claude/OpenAI support
2025 Q4  v0.4.x  TypeScript extension system introduced, Ollama local model support
2026 Q1  v0.6.x  RPC/SDK modes launched, multi-Agent parallel execution
2026 Q2  v0.7.x  MCP protocol integrated, context compression mechanism added
2026 Q3  v0.84   Stable release, GitHub Stars surpass 90K
Advanced Configuration and Optimization
Performance Tuning
For large projects, Pi’s context management is critical. You can optimize performance with these settings:
1. Set context window size
Configure in ~/.pi/config.json:
{
  "contextWindow": 128000,
  "maxTokens": 8192,
  "temperature": 0.7
}
A larger context window lets Pi view more code simultaneously but increases API costs. Recommended adjustments by project size:
- Small projects (< 100 files): 128K tokens
- Medium projects (100-500 files): 200K tokens
- Large projects (> 500 files): Use
--compactfrequently
2. Configure smart ignore rules
Create a .piignore file to exclude content that doesn’t need indexing:
node_modules/
dist/
build/
*.min.js
*.map
coverage/
.nyc_output/
*.log
.DS_Store
This significantly improves Pi’s response speed and avoids wasting tokens on irrelevant files.
3. Enable caching
Pi supports local caching to reduce redundant requests:
{
  "cache": {
    "enabled": true,
    "ttl": 3600,
    "maxSize": "500MB"
  }
}
The cache stores recent conversations and file indexes in ~/.pi/cache/, speeding up responses to repeated queries by 3-5x.
Multi-Model Strategy
Different tasks suit different models, and Pi supports dynamic switching:
# Use a fast model for simple tasks
pi --model gpt-4o-mini "Format this code"

# Use a powerful model for complex refactoring
pi --model claude-opus-4 "Refactor the entire authentication module"

# Use a local model for sensitive code
pi --model ollama/qwen2.5-coder "Analyze this encryption algorithm"
In interactive mode, use the /model command to switch in real time without restarting the session.
Custom Workflows
Pi supports workflow automation through its Hook system:
{
  "hooks": {
    "beforeWrite": ["npm run lint --fix"],
    "afterWrite": ["npm run format"],
    "beforeBash": ["echo 'Executing command...'"]
  }
}
This way, Pi auto-formats after every file write and shows a prompt before executing commands, ensuring consistent code style.
Real-World Example: Building a Complete IoT Project
Let’s use Pi to build a smart home monitoring system from scratch:
Requirements: ESP32 collects temperature/humidity data, sends it via MQTT to a backend, and the frontend displays it in real time.
Step 1: Backend Service
> Create a backend service using Fastify + MQTT.js to receive sensor data from ESP32,
> store it in a time-series database, and provide a REST API for querying historical data
Pi generates:
server.js: Fastify server + MQTT clientdatabase.js: InfluxDB connection and data writingroutes.js: REST API (GET /api/sensors, GET /api/history)docker-compose.yml: InfluxDB + EMQX container configuration
Step 2: ESP32 Firmware
> Write ESP32 Arduino code to read DHT22 temperature/humidity,
> connect to an MQTT broker over WiFi, and publish data every 10 seconds
Pi generates complete Arduino code including:
- WiFi connection management (auto-reconnect)
- DHT22 reading (with error handling)
- MQTT publishing (JSON format)
- Low-power mode (deep sleep)
- OTA update support
Step 3: Frontend Interface
> Create a monitoring dashboard using React + Chart.js,
> displaying real-time temperature/humidity curves with time range filtering
Pi generates:
App.jsx: Main interface layoutSensorChart.jsx: Chart.js real-time chartapi.js: Backend API callsWebSocket.js: Real-time data push
The entire project is ~800 lines of code, completed by Pi in 15 minutes, with comprehensive error handling and documentation.
FAQ and Solutions
Q1: Is Pi Agent free?
The Pi tool itself is completely free and open source (MIT license). However, using AI models costs money — you can bring your own API key (pay-per-use to the model provider) or use local models like Ollama for completely free usage.
Q2: Which AI models does Pi support?
It currently supports 15+ providers, including: Anthropic (Claude series), OpenAI (GPT-4o/o3 series), Google (Gemini series), Mistral, AWS Bedrock, Azure OpenAI, Groq, local Ollama/LM Studio, and more. Use pi --list-providers to see the full list.
Q3: What’s the difference between Pi and Claude Code?
The key difference: Pi is open source, supports multiple model providers, and has a TypeScript extension system; Claude Code is Anthropic’s official product, supports only Claude models, but offers tighter integration. Pi is better suited for users who need model flexibility and deep customization.
Q4: Can Pi run on Windows?
Yes, but it requires WSL2 (Windows Subsystem for Linux). Native Windows support is not on the current roadmap — Windows users are advised to install WSL2 first.
Q5: How is code security ensured? Does Pi send my code to the cloud?
Pi itself collects no data. Your code is sent to the API of your chosen model provider (e.g., Anthropic, OpenAI), subject to that provider’s privacy policy. Using a local model (Ollama) enables fully offline operation — your code never leaves your machine.
Q6: How large is Pi’s context window?
It depends on the model you’re using. Claude Sonnet/Opus supports 200K tokens, GPT-4o supports 128K tokens. Pi also implements automatic context compression to retain key information during long sessions.
Q7: How do I share Pi configuration across a team?
Commit non-sensitive configuration (theme, auto-approve settings, etc.) from .pi/config.json to a .pi/ directory in your project repo. Sensitive information like API keys should use the PI_API_KEY environment variable or a .env file (added to .gitignore).
Q8: Can Pi and Cursor be used together?
Absolutely. Many developers use Cursor as their editor and Pi as a “power assistant” in the terminal. A typical workflow: browse and edit code in Cursor, then switch to the terminal for complex tasks (refactoring, batch modifications, debugging) and let Pi handle them. They complement each other without conflict.
Q9: Is Pi’s bash tool safe?
By default, Pi displays each bash command and waits for your confirmation (Y/n) before executing. It only auto-executes when you set autoApprove: true. Recommendation: keep the default confirmation mode for daily development, and only enable auto-approve inside Docker containers or disposable environments. You can also use --allowedTools "bash(git *),read,write,edit" to precisely control which commands Pi can execute.
Q10: How do I uninstall Pi?
# If installed via npm
npm uninstall -g @earendil-works/pi-coding-agent

# If installed via the one-liner script
rm -f ~/.local/bin/pi

# Remove config and cache (optional)
rm -rf ~/.pi
Common Errors and Troubleshooting
Error 1: command not found: pi
The command isn’t found after installation — usually because PATH doesn’t include the install directory. Reopen your terminal, or manually add the install directory to PATH:
export PATH="$HOME/.local/bin:$PATH"
echo 'export PATH="$HOME/.local/bin:$PATH"' >> ~/.bashrc
Error 2: API Key Authentication Failed
Check whether environment variables are being overridden by old configuration:
pi doctor # Run diagnostic commandCommon causes: empty apiKey in ~/.pi/config.json, misspelled environment variable name (should be ANTHROPIC_API_KEY, not ANTHROPIC_KEY), or an expired key.
Error 3: Context Window Exhausted
A “context length exceeded” error appears after a long conversation. Solutions:
- Type
/compactto compress the context - Or restart the session and use
--resumeto restore and continue - Or split the task into multiple smaller sessions
Error 4: Model Request Timeout
Common with unstable network connections. Solutions:
- Check your network connection and proxy settings
- Increase the
timeoutfield in your config (default: 60 seconds) - Switch to a faster-responding model (e.g., use Haiku instead of Sonnet for simple tasks)
Pi Coding Agent represents an important direction for AI coding tools: open source, terminal-native, and model-agnostic. For developers who are comfortable with command-line workflows — especially IoT and embedded engineers who frequently need SSH remote development — Pi is one of the most flexible options available today. If you’re looking for an AI coding assistant that isn’t vendor-locked and can be deeply customized, Pi is well worth a try.