 物联网
物联网 Build an ESP32 Occupancy Sensor for $5: The Complete HLK-LD2410 mmWave Radar DIY Guide
Why You Need a mmWave Occupancy Sensor
Traditional PIR infrared sensors only detect motion — when you sit on the couch reading a book or crouch on the toilet scrolling your phone, the PIR assumes “nobody’s here” and turns off the lights. This is one of the most frustrating experiences in smart home automation.
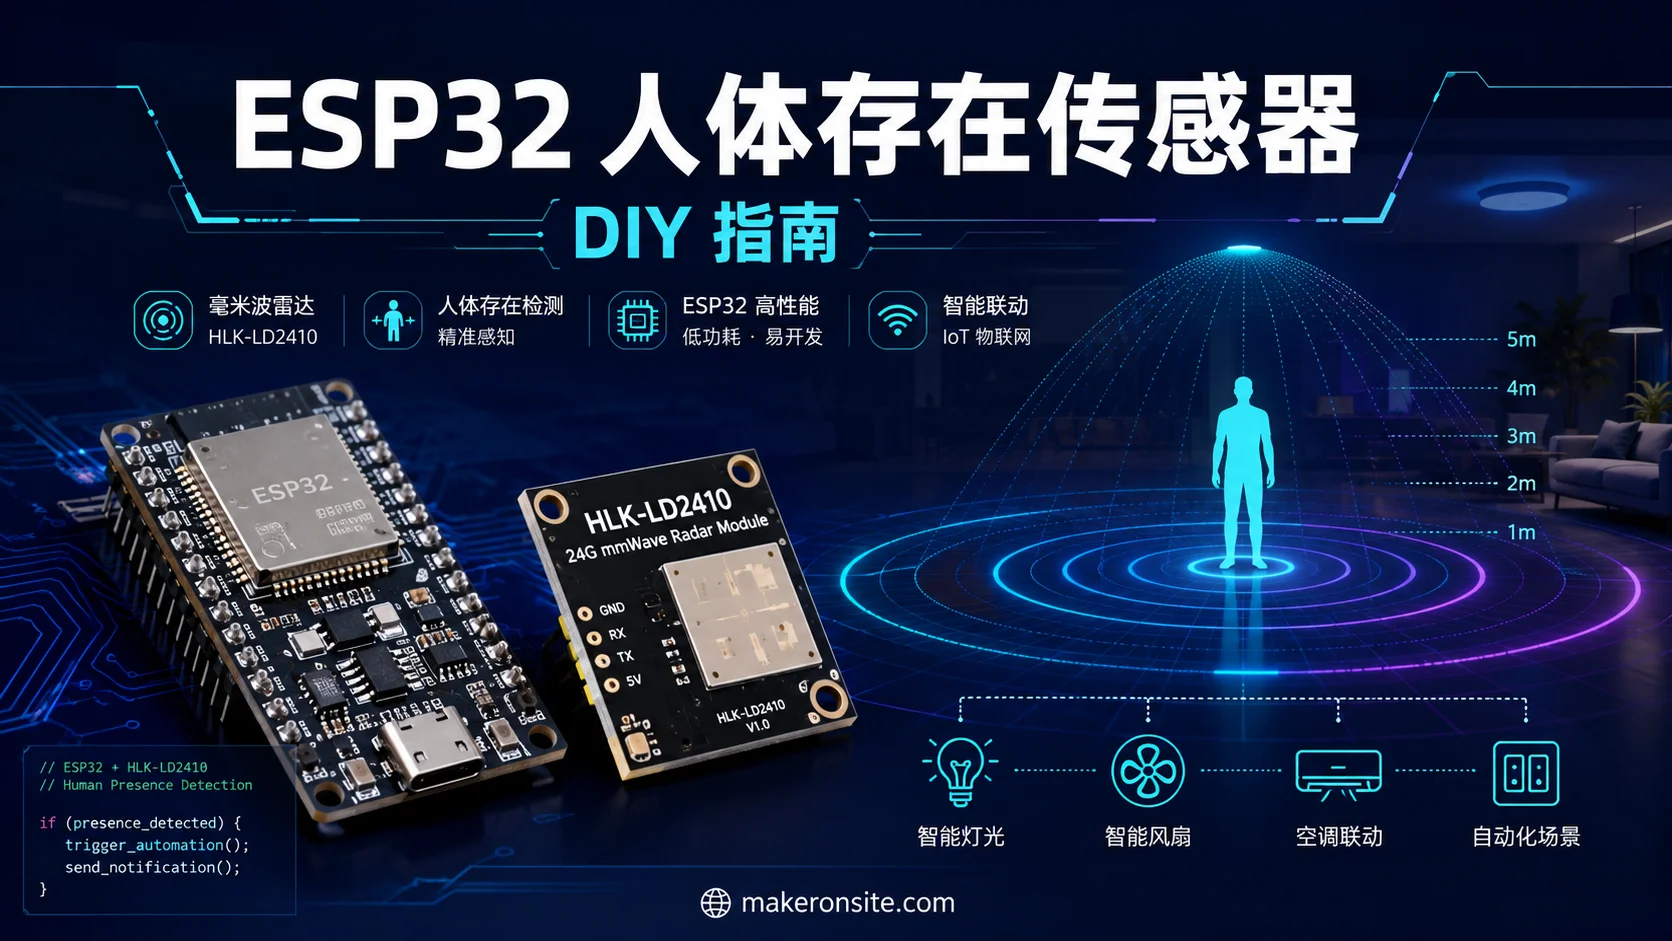
mmWave radar solves this problem completely. By emitting 24 GHz electromagnetic waves and analyzing the reflected signals, it can detect even the subtlest human movements — including the rise and fall of your chest from breathing. This means as long as someone is in the room, even perfectly still, the sensor accurately reports “occupied.”
mmWave radar works on the principles of the Doppler effect and FMCW (Frequency-Modulated Continuous Wave) technology. The electromagnetic waves emitted by the module bounce off objects and return; by analyzing the frequency shift and phase difference of the reflected waves, the system can precisely calculate target distance, velocity, and presence status. This technology was originally used in military and aviation applications but has since been commercialized with dramatically reduced costs.
The good news: an ESP32 ($3) plus an HLK-LD2410 mmWave radar module ($2) — total cost under $5 — can produce a presence sensor that rivals commercial products.
Sensor Comparison: PIR vs mmWave Radar vs Ultrasonic
Before diving in, let’s understand the trade-offs of the three mainstream human detection approaches:
| Feature | PIR Infrared | mmWave Radar | Ultrasonic |
|---|---|---|---|
| Detects stationary humans | ❌ No | ✅ Yes | ✅ Yes |
| Detection range | 5–12 m | 0.2–6 m (adjustable) | 0.2–3 m |
| Penetration | Line-of-sight required | Can penetrate thin walls/plastic enclosures | Line-of-sight required |
| Power consumption | Very low (μA range) | Moderate (~100 mA) | Moderate |
| Light interference resistance | Poor (temperature-dependent) | Strong | Strong |
| Cost | $1–2 | $2–5 | $2–3 |
| Privacy | High | High (no image capture) | High |
PIR infrared sensors work by detecting changes in infrared radiation emitted by the human body. When a person moves, the change in infrared radiation is captured by the pyroelectric sensor. But if you stay still, the infrared radiation distribution stabilizes and the sensor can no longer detect you. PIR’s advantage is its extremely low power consumption, making it ideal for battery-powered corridor lights, stairway lights, and other scenarios where “someone must be walking.”
mmWave radar excels at detecting micro-movements and can even distinguish between moving and stationary targets. The HLK-LD2410 module separately reports the distance and energy of both “moving targets” and “stationary targets,” letting you determine whether someone is walking around the room or sitting still. This capability is critical for smart lighting, HVAC control, and security monitoring scenarios.
Ultrasonic sensors emit ultrasonic waves and measure echo time to calculate distance. They can detect stationary objects, but the beam angle is narrow and coverage is limited. Ultrasonic sensors are better suited for precise distance measurement (like parking sensors) and not ideal for room-level presence detection.
Bottom line: If you’re building smart lighting automation, mmWave radar is the best choice — it detects stationary humans, can be hidden inside walls or ceilings, and costs very little. PIR is suited for corridors and staircases where “someone must be walking.” Ultrasonic sensors have an edge in short-range distance measurement but are not suitable for presence detection.
Bill of Materials
| Component | Model | Reference Price |
|---|---|---|
| Main board | ESP32-DevKitC / ESP32-WROOM-32 | $3 |
| mmWave radar module | HLK-LD2410 (24 GHz) | $2 |
| Dupont wires | Female-to-female, 4 pcs | $0.50 |
| Micro-USB data cable | $1 | |
| Breadboard (optional) | 830 holes | $2 |
About the HLK-LD2410 module: This module is based on 24 GHz FMCW radar technology with built-in signal processing algorithms. It directly outputs target status (present/absent), target distance, and motion energy. The module integrates both transmit and receive antennas internally — no external antenna needed. It communicates via UART serial at a default baud rate of 256000 (which can be changed to 115200 via command for ESP32 software serial compatibility).
Module pinout:
- VCC: Power pin, supports 3.3 V or 5 V
- GND: Ground
- OUT (TX): Data output pin, sends radar data frames
- IN (RX): Data input pin, receives configuration commands
Purchasing advice: The HLK-LD2410 comes in several variants: LD2410 (standard), LD2410P (enhanced, longer detection range), and LD2420 (newer version with more features). For beginners, the standard LD2410 is more than sufficient — it’s the cheapest and has the most documentation available.
Wiring Diagram
Wiring the HLK-LD2410 to the ESP32 is straightforward — only 4 wires needed:
HLK-LD2410          ESP32-DevKitC
┌──────────┐        ┌──────────┐
│      VCC │───────▶│ 3.3V     │
│      GND │───────▶│ GND      │
│      OUT │───────▶│ GPIO16   │  (UART2 RX)
│      IN  │◀───────│ GPIO17   │  (UART2 TX)
└──────────┘        └──────────┘
Wiring notes:
- VCC → 3.3 V: The LD2410 supports 3.3 V power, so no level shifting is needed. If you use 5 V power (e.g., USB 5 V), the module still works fine, but keep in mind the ESP32 GPIOs are 3.3 V logic — level shifting might seem necessary (in practice, the LD2410’s 3.3 V output is ESP32-compatible, so no conversion is needed)
- OUT → GPIO16: The module’s TX pin connects to the ESP32’s UART RX. GPIO16 is ESP32’s UART2 RX pin
- IN → GPIO17: The module’s RX pin connects to the ESP32’s UART TX. GPIO17 is ESP32’s UART2 TX pin
- If you only need to read sensor data (no parameter configuration), you can get away with just VCC, GND, and OUT — three wires total
Common wiring mistakes:
- TX/RX swapped: The module’s OUT (TX) must connect to the ESP32’s RX, and the module’s IN (RX) must connect to the ESP32’s TX. Swapped connections will cause serial communication to fail
- Insufficient power: When using USB power, make sure the cable supports data + power (not a charge-only cable). Some low-quality USB cables have too much resistance, causing voltage drop
- Ground not connected: Both VCC and GND must be connected, or the module won’t work
Complete Arduino Code
The following code reads HLK-LD2410 data frames via UART, parses target status and distance, and publishes to Home Assistant over MQTT:
#include <WiFi.h>
#include <PubSubClient.h>
#include <HardwareSerial.h>

// ===== WiFi & MQTT Configuration =====
const char* ssid = "YOUR_WIFI_SSID";
const char* password = "YOUR_WIFI_PASSWORD";
const char* mqtt_server = "192.168.1.100";  // Home Assistant IP
const char* mqtt_user = "your_mqtt_user";
const char* mqtt_pass = "your_mqtt_password";

// ===== Pin Definitions =====
#define RADAR_RX  16   // Connect to LD2410 OUT/TX
#define RADAR_TX  17   // Connect to LD2410 IN/RX

// ===== MQTT Topics =====
const char* topic_presence = "home/sensor/living_room/presence";
const char* topic_distance  = "home/sensor/living_room/distance";
const char* topic_energy    = "home/sensor/living_room/energy";

HardwareSerial RadarSerial(2);
WiFiClient espClient;
PubSubClient mqtt(espClient);

// ===== Data Parsing Variables =====
bool targetState = false;     // true=present, false=absent
int  moveDistance = 0;        // Target distance (cm)
int  moveEnergy = 0;          // Motion energy (0-100)

void setup() {
  Serial.begin(115200);
  RadarSerial.begin(256000, SERIAL_8N1, RADAR_RX, RADAR_TX);

  // Connect to WiFi
  WiFi.begin(ssid, password);
  while (WiFi.status() != WL_CONNECTED) {
    delay(500);
    Serial.print(".");
  }
  Serial.println("\nWiFi connected");

  // Configure MQTT
  mqtt.setServer(mqtt_server, 1883);
  mqtt.setBufferSize(512);
}

void reconnectMQTT() {
  while (!mqtt.connected()) {
    Serial.print("Connecting MQTT...");
    if (mqtt.connect("ESP32-Radar-Sensor", mqtt_user, mqtt_pass)) {
      Serial.println("OK");
    } else {
      Serial.printf("Failed, rc=%d\n", mqtt.state());
      delay(5000);
    }
  }
}

// ===== Parse LD2410 Data Frames =====
void parseRadarData() {
  static uint8_t buffer[256];
  static int bufIndex = 0;

  while (RadarSerial.available()) {
    uint8_t c = RadarSerial.read();

    // Frame header: 0xF4 0xF3 0xF2 0xF1
    if (bufIndex == 0 && c != 0xF4) continue;
    if (bufIndex == 1 && c != 0xF3) { bufIndex = 0; continue; }
    if (bufIndex == 2 && c != 0xF2) { bufIndex = 0; continue; }
    if (bufIndex == 3 && c != 0xF1) { bufIndex = 0; continue; }

    buffer[bufIndex++] = c;

    // Frame tail: 0xF8 0xF7 0xF6 0xF5
    if (bufIndex >= 8 &&
        buffer[bufIndex-4] == 0xF8 &&
        buffer[bufIndex-3] == 0xF7 &&
        buffer[bufIndex-2] == 0xF6 &&
        buffer[bufIndex-1] == 0xF5) {

      // Parse target status (bytes 8-9, 0x0000=absent, 0x0001=present)
      if (bufIndex >= 12) {
        targetState = (buffer[9] == 0x01);
        moveDistance = buffer[10] | (buffer[11] << 8);
      }
      // Parse motion energy
      if (bufIndex >= 16) {
        moveEnergy = buffer[14];
      }

      bufIndex = 0;  // Reset buffer
    }

    if (bufIndex >= sizeof(buffer)) bufIndex = 0;
  }
}

void loop() {
  if (!mqtt.connected()) reconnectMQTT();
  mqtt.loop();

  parseRadarData();

  // Publish every 2 seconds
  static unsigned long lastPublish = 0;
  if (millis() - lastPublish > 2000) {
    lastPublish = millis();

    mqtt.publish(topic_presence, targetState ? "ON" : "OFF");
    mqtt.publish(topic_distance, String(moveDistance).c_str());
    mqtt.publish(topic_energy, String(moveEnergy).c_str());

    Serial.printf("Presence: %s | Distance: %d cm | Energy: %d\n",
                  targetState ? "YES" : "NO", moveDistance, moveEnergy);
  }
}
Code notes:
- Uses ESP32’s
HardwareSerial(2)to communicate with the LD2410 at 256000 baud. You can’t use the default Serial (UART0) because that’s used for debug output - Data frames start with
F4 F3 F2 F1and end withF8 F7 F6 F5. The code uses a state-machine approach to parse byte-by-byte, ensuring correct synchronization even if reading starts mid-stream - Parses target status (present/absent), target distance (cm), and motion energy (0–100). Distance is a two-byte value (low byte first); energy is a single byte
- Publishes three MQTT topics: presence (ON/OFF), distance (cm), energy (0–100). Publishing every 2 seconds avoids overloading the MQTT broker
Required libraries:
PubSubClient: MQTT client library, install via Arduino IDE Library ManagerWiFi: Built-in ESP32 WiFi library, no extra installation needed
Home Assistant Integration
Method 1: MQTT Sensor (Recommended)
Add the following to your Home Assistant configuration.yaml:
mqtt:
  sensor:
    - name: "Living Room Occupancy Sensor"
      state_topic: "home/sensor/living_room/presence"
      payload_on: "ON"
      payload_off: "OFF"
      device_class: occupancy
      unique_id: "lr_occupancy"

    - name: "Living Room Target Distance"
      state_topic: "home/sensor/living_room/distance"
      unit_of_measurement: "cm"
      icon: "mdi:signal-distance-variant"
      unique_id: "lr_distance"

    - name: "Living Room Motion Energy"
      state_topic: "home/sensor/living_room/energy"
      unit_of_measurement: "%"
      icon: "mdi:pulse"
      unique_id: "lr_energy"
Configuration notes:
device_class: occupancytells Home Assistant to automatically recognize this as an occupancy sensor, displaying the appropriate icon in the UIunique_idensures the sensor retains its history across restarts and prevents duplicate entries- If you use the MQTT integration (via Home Assistant’s Settings → Devices & Services → MQTT), you can add sensors directly through the UI without editing YAML
Method 2: ESPHome (Zero-Code Approach)
If you don’t want to write Arduino code, you can use ESPHome’s ld2410 component. ESPHome is Home Assistant’s officially recommended firmware framework — it generates firmware from YAML configuration with no programming required.
esphome:
  name: living-room-presence
  friendly_name: "Living Room Occupancy Sensor"

esp32:
  board: esp32dev
  framework:
    type: arduino

wifi:
  ssid: !secret wifi_ssid
  password: !secret wifi_password

api:
  encryption:
    key: !secret api_key

logger:
  baud_rate: 0  # Disable serial logging to avoid conflict with radar

uart:
  tx_pin: GPIO17
  rx_pin: GPIO16
  baud_rate: 256000

ld2410:
  timeout:
    no_target: 5s
    has_target: 2s
  max_distances:
    motion: 6m
    static: 4.5m

binary_sensor:
  - platform: ld2410
    has_target:
      name: "Occupied"
      device_class: occupancy

sensor:
  - platform: ld2410
    moving_distance:
      name: "Moving Target Distance"
    static_distance:
      name: "Stationary Target Distance"
    moving_energy:
      name: "Motion Energy"
    static_energy:
      name: "Stationary Energy"
Save the above YAML as living-room-presence.yaml and upload it via the ESPHome Dashboard. ESPHome has native LD2410 support — no extra components needed.
ESPHome advantages:
- Zero code: Configure via YAML, no programming required
- Auto-discovery: Home Assistant automatically detects and adds the device — no manual MQTT configuration
- OTA updates: Supports wireless firmware updates without rewiring
- Built-in component: The LD2410 component is well-tested and stable
Power Optimization: Battery-Powered Setup
The HLK-LD2410 draws about 100 mA during continuous operation. With an 18650 battery (2500 mAh), theoretical runtime is roughly 25 hours — not ideal for a presence sensor.
Optimization strategies:
-
Deep sleep + timed wake: The ESP32 enters deep sleep (~10 μA) and wakes every 30 seconds for 2 seconds to read radar data. Average power consumption drops to about 10 mA, extending 18650 runtime to 10+ days. This approach suits scenarios where real-time response isn’t critical, such as room occupancy statistics.
-
LD2410 OUT pin interrupt: The LD2410’s OUT pin goes HIGH when a target is detected. Connect this pin to an ESP32 GPIO configured as a wake-up source. When no one is present, the ESP32 stays in deep sleep; when someone is detected, it wakes and reports data. This approach balances low power and real-time responsiveness — the best overall option.
-
Reduce transmit power: Use serial commands to lower the LD2410’s transmit power, cutting module consumption below 50 mA at the cost of reduced detection range. Suitable for small rooms (e.g., bathrooms).
Deep sleep example code:
#define WAKE_PIN GPIO4  // Connect to LD2410 OUT pin

void setup() {
  // Configure GPIO4 as wake-up source (HIGH level wake)
  esp_sleep_enable_ext0_wakeup(WAKE_PIN, HIGH);

  // ... initialization code ...
}

void loop() {
  // Read data and publish
  readAndPublish();

  // Enter deep sleep, waiting for OUT pin HIGH to wake
  esp_deep_sleep_start();
  // After wake, restarts from setup()
}
Battery selection advice:
- 18650 lithium cell: High capacity (2000–3500 mAh), suitable for long-term operation. Requires a charging module (e.g., TP4056)
- 18650 battery holder: Get one with a built-in switch for easy battery swaps
- USB power: If using a USB charger, power consumption isn’t a concern, but you lose the flexibility of battery power
Deployment Tips
- Mounting position: Ceiling center or high on a wall; avoid pointing directly at doors/windows (outdoor moving objects cause false triggers). Optimal height is 2.5–3 meters for full room coverage
- Sensitivity tuning: Adjust gate thresholds via serial commands to match different room sizes. Increase sensitivity for large rooms (living room); decrease for small rooms (bathroom) to avoid false triggers
- Interference avoidance: Keep away from microwaves (2.4 GHz) and metal reflective surfaces. Running microwaves generate strong 2.4 GHz interference that can cause false reports
- Enclosure design: When 3D-printing an enclosure, note that radar waves penetrate plastic (ABS/PLA) but not metal. Keep wall thickness under 3 mm — thicker walls attenuate the signal
- Multi-sensor deployment: For rooms with multiple entrances, deploy multiple sensors and use Home Assistant logic to综合 determine room occupancy
- Debugging tips: Use the serial monitor to view raw sensor output; observe how distance and energy values change to understand the sensor’s behavior
Troubleshooting
Problem 1: No serial data output
- Check wiring: Are TX/RX swapped?
- Check baud rate: LD2410 defaults to 256000 — your code must match
- Check power: Measure VCC pin voltage with a multimeter; ensure it’s around 3.3 V
Problem 2: Sensor always reports “occupied”
- Check mounting position: Is it facing doors/windows, AC vents, or fans?
- Lower sensitivity: Adjust gate thresholds via serial commands
- Check for interference sources: Any microwaves, cordless phones, or other 2.4 GHz devices nearby?
Problem 3: Sensor always reports “unoccupied”
- Check detection range: Is the target beyond the sensor’s maximum range (6 m)?
- Increase sensitivity: Adjust gate thresholds via serial commands
- Check target: Can the sensor detect micro-movements (like chest movement from breathing)?
Problem 4: MQTT connection fails
- Check WiFi signal: Ensure the ESP32 has a stable WiFi connection
- Check MQTT broker: Confirm Home Assistant’s MQTT integration is enabled
- Check credentials: Make sure the MQTT username and password are correct
Summary
For just $5, you can build a commercial-grade human presence sensor — that’s the beauty of open-source hardware. The HLK-LD2410 mmWave radar module solves the PIR sensor’s “can’t detect stationary humans” pain point, and combined with the ESP32’s WiFi and MQTT capabilities, it integrates seamlessly into the Home Assistant smart home ecosystem.
Key advantages of this project:
- Extremely low cost: Total cost under $5, far below commercial products (typically $20–50)
- Excellent performance: Detects stationary humans with a range up to 6 meters
- Easy integration: Seamlessly connects to Home Assistant via MQTT or ESPHome
- Highly customizable: Adjust sensitivity, detection range, power consumption, and other parameters to fit your needs
If you’ve already completed the ESP32-C6 Matter guide, this sensor project can serve as the first custom device on your Matter network — the next step is wrapping it as a Matter sensor accessory for true cross-platform smart home automation.