 Jetson Nano
 Installing Jupyter Lab on Jetson Nano
Jetpack 4.3 was recently released with many new features and system optimizations. Eager to try it out, I flashed the SD card and discovered that unlike the Jetbot image, Jupyter Lab wasn’t pre-installed. How could such a great Python web editor be missing? So began my day of tinkering.
This article is based on research, translation, and hands-on practice with troubleshooting. If there are any omissions or errors, please correct them.
Now sharing the Jupyter Lab installation process.
1. First Install Some Dependencies
sudo apt install nodejs npm2. Install pip3 Package Manager
sudo apt install python3-pip3. Install Jupyter Lab
pip3 install jupyter jupyterlab4. Reboot
sudo reboot5. Start Jupyter Lab
Now it’s installed.
Enter the jupyter lab command in the terminal to start Jupyter Lab.
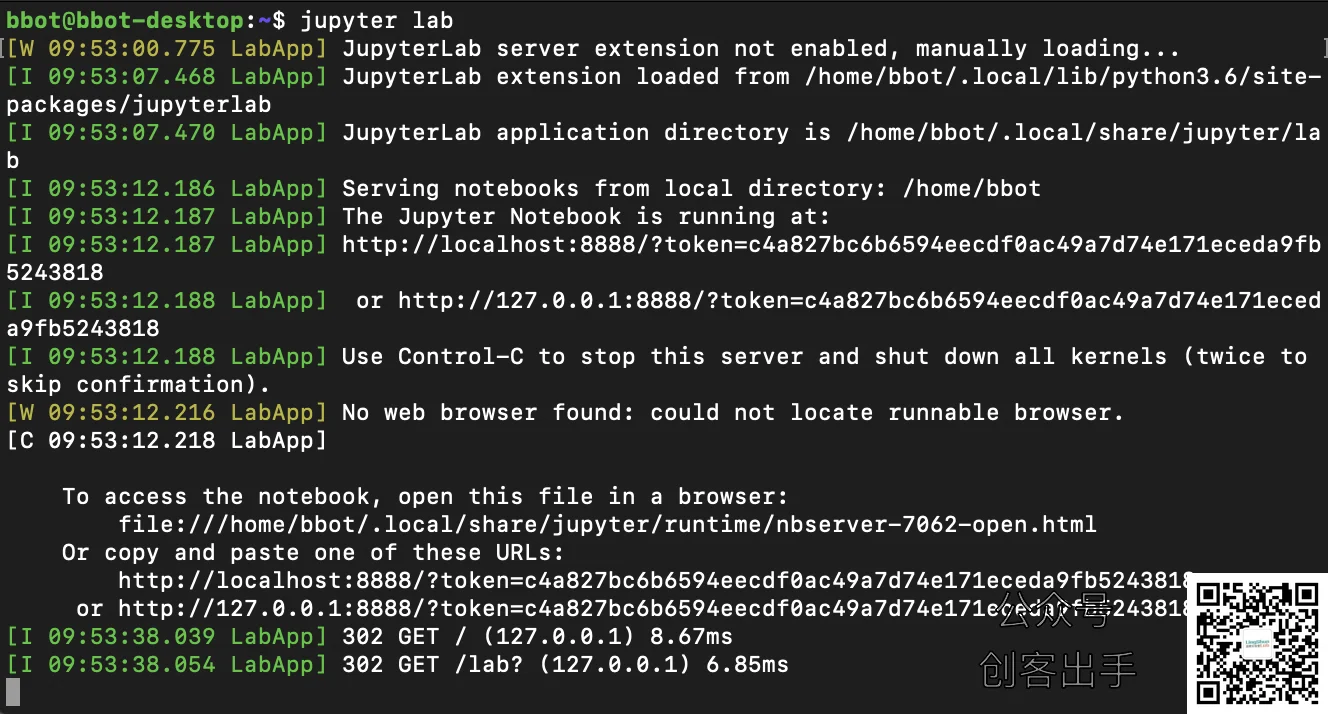
But two issues will arise:
-
- You can access Jupyter Lab by entering localhost:8888 in the browser, but only the local machine can access it; other hosts (terminals) on the LAN cannot access it;
-
- It will ask you for a password or token. The token is too long to remember, so we need to set a password.
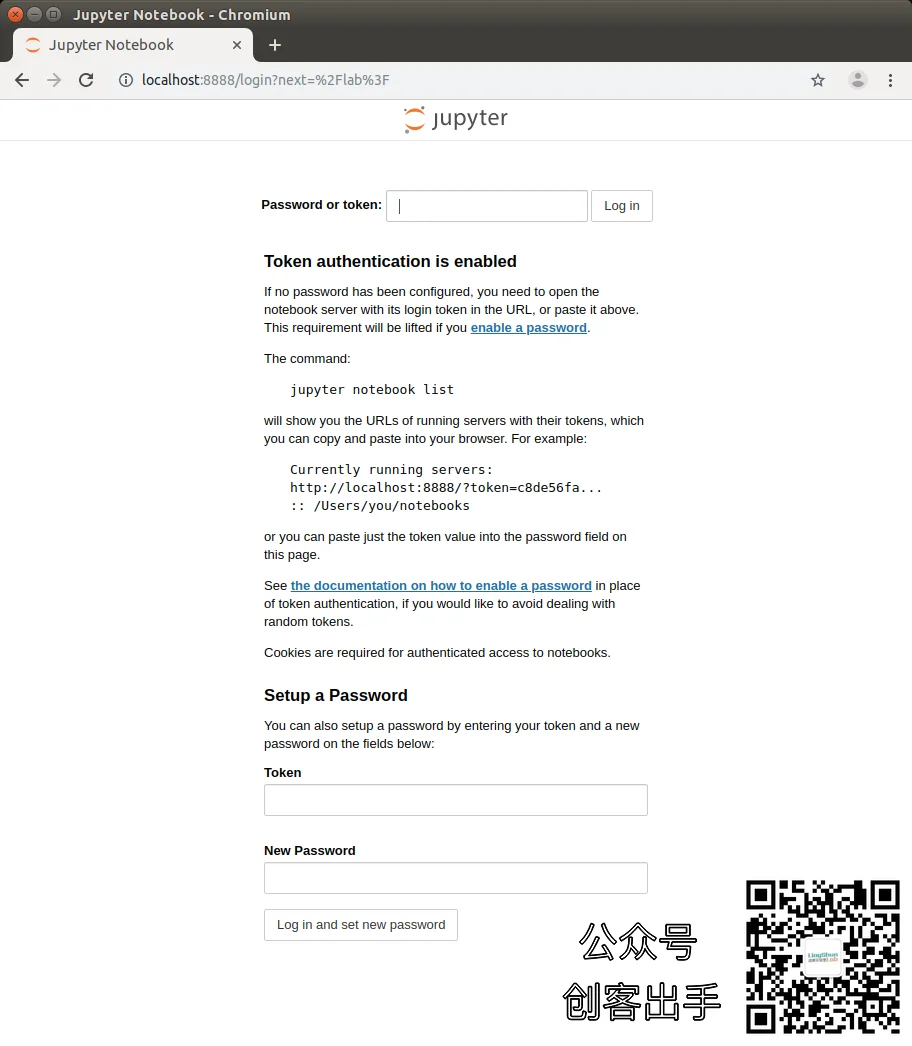
First, close the running Jupyter Lab process by pressing ctrl+c in the current terminal window.
Now let’s solve the above issues:
6. Generate Jupyter Lab Configuration File
jupyter lab --generate-configAfter entering the command, you’ll see output like:

It will show the configuration file saved at:
Writing default config to: /home/bbot/.jupyter/jupyter_notebook_config.pyThe “bbot” in the path is our username, this information will vary depending on your username.
7. Edit the Jupyter Lab Configuration File
I prefer using nano. Some experts use vi/vim, as long as you can edit it. Enter the following command:
nano /home/bbot/.jupyter/jupyter_notebook_config.pyFind these two parameters, remove the # in front, and modify them as follows:
...
c.NotebookApp.allow_origin = '*' # allow all origins
#or
c.ServerApp.allow_origin = '*' # allow all origins
...
c.NotebookApp.ip = '0.0.0.0' # listen on all IPs
#or
c.ServerApp.ip = '0.0.0.0'
Press ctrl +o to save, press ctrl+x to exit.
Set Password
jupyter-lab passwordAt this point, you’ll see
Enter password: , enter your password and press enter (nothing will appear on the command line at this time, this is normal)
Then you’ll see
Verify password: , enter your password again and press enter to verify both entries match (nothing will appear on the command line at this time, this is normal)
After that, it will prompt that the password has been saved to the configuration file
Wrote hashed password to /home/bbot/.jupyter/jupyter_notebook_config.json
Finally, use the jupyter lab command again.
Now hosts on the LAN can also access it. Enter the Jetson Nano’s IP address plus port 8888, for example: http://ipaddress:8888, it will prompt for password, enter the password you set.
References for this article: Jupyter Lab documentation: https://jupyterlab.readthedocs.io/en/stable/index.html Nvidia Developer Forums: https://devtalk.nvidia.com/default/topic/1049646/jetson-nano/jupyter-notebook-in-jetson-nano/
Why Choose Jupyter Lab Over Jupyter Notebook?
In the tutorial above, we installed Jupyter Lab instead of the traditional Jupyter Notebook, and there’s a reason for this:
- More Modern Interface: Jupyter Lab provides an IDE-like multi-tab interface where you can open code files, terminals, Markdown files, etc. simultaneously
- Better Extensibility: Supports a richer plugin ecosystem, with various extensions installable through the plugin manager
- Supports More File Types: Besides .ipynb notebooks, it also supports CSV viewer, JSON editor, image preview, etc.
- Future Direction: Jupyter Lab is the focus development direction of the Jupyter project, and the traditional Notebook interface will gradually be replaced
Set Up Jupyter Lab to Auto-Start on Boot
It’s tedious to manually enter the jupyter lab command every time. We can create a systemd service to make it run automatically on boot.
First, create the service file:
sudo nano /etc/systemd/system/jupyter.serviceWrite the following content (note to replace bbot with your username):
[Unit]
Description=Jupyter Lab Server
After=network.target

[Service]
Type=simple
User=bbot
ExecStart=/home/bbot/.local/bin/jupyter lab --config=/home/bbot/.jupyter/jupyter_notebook_config.py
Restart=on-failure
RestartSec=10

[Install]
WantedBy=multi-user.target
After saving, enable and start the service:
# Reload systemd configuration
sudo systemctl daemon-reload

# Set to start on boot
sudo systemctl enable jupyter

# Start the service immediately
sudo systemctl start jupyter

# Check service status
sudo systemctl status jupyter
Now after rebooting Jetson Nano, Jupyter Lab will automatically run in the background, and you can access it directly through the browser.
Remote Access Solutions
If you need to remotely access Jupyter Lab on Jetson Nano when you’re out, here are several solutions:
Solution 1: SSH Tunnel (Recommended, Secure)
Execute on your local computer:
ssh -L 8888:localhost:8888 bbot@your_Jetson_IP_addressThen open http://localhost:8888 in your local browser. This way all traffic is encrypted through SSH, very secure.
Solution 2: Use ngrok (No Public IP Required)
ngrok can expose local ports to the public network:
# Install ngrok
sudo snap install ngrok

# Start tunnel, map port 8888
ngrok http 8888
ngrok will give you a public address (like https://xxxx.ngrok.io), access this address on any device to connect to your Jupyter Lab.
Solution 3: Use frp for Intranet Penetration
If you have your own cloud server, you can use frp for intranet penetration. This method is more stable and suitable for long-term use.
Useful Jupyter Extension Recommendations
Jupyter Lab supports rich extensions. Here are some practical recommendations:
# Install extension manager (built-in in Jupyter Lab 3.x+)
# Install code formatting extension
pip install jupyterlab_code_formatter black isort

# Install theme extension
pip install jupyterlab-materialdarker

# Install git extension for convenient code version management in Jupyter
pip install jupyterlab-git

# Install drawio drawing extension
pip install jupyterlab-drawio
After installation, restart Jupyter Lab. You’ll see the newly added Git panel, Drawio drawing tool, etc. in the left sidebar.
Common Troubleshooting
Issue 1: Port Conflict (Address already in use)
If you see Port 8888 is already in use when starting, it may be because previous Jupyter processes didn’t close properly:
# Find the process occupying port 8888
lsof -i :8888

# Or check with netstat
sudo netstat -tlnp | grep 8888

# Kill the corresponding process
kill -9 process_PID
You can also modify the port number in the configuration file:
c.ServerApp.port = 8889 # Change to another portIssue 2: Kernel Crash Due to Insufficient Memory
Jetson Nano only has 4GB of memory. Running large deep learning models may cause the Jupyter kernel to crash. Solution:
# Increase swap space (requires at least 8GB SD card/disk space)
sudo fallocate -l 8G /swapfile
sudo chmod 600 /swapfile
sudo mkswap /swapfile
sudo swapon /swapfile

# Write swap to fstab to make it permanent
echo '/swapfile none swap sw 0 0' | sudo tee -a /etc/fstab
Issue 3: Compilation Failure When Installing Packages Like dlib
When installing some Python packages that require compilation on Jetson Nano, errors may occur. Make sure you’ve installed the necessary compilation tools:
sudo apt install build-essential cmake
sudo apt install libopenblas-dev liblapack-dev libjpeg-dev
Hope these supplementary contents help you better use Jupyter Lab for development!